All posts by chasenfratz

Filmstrip Challenge

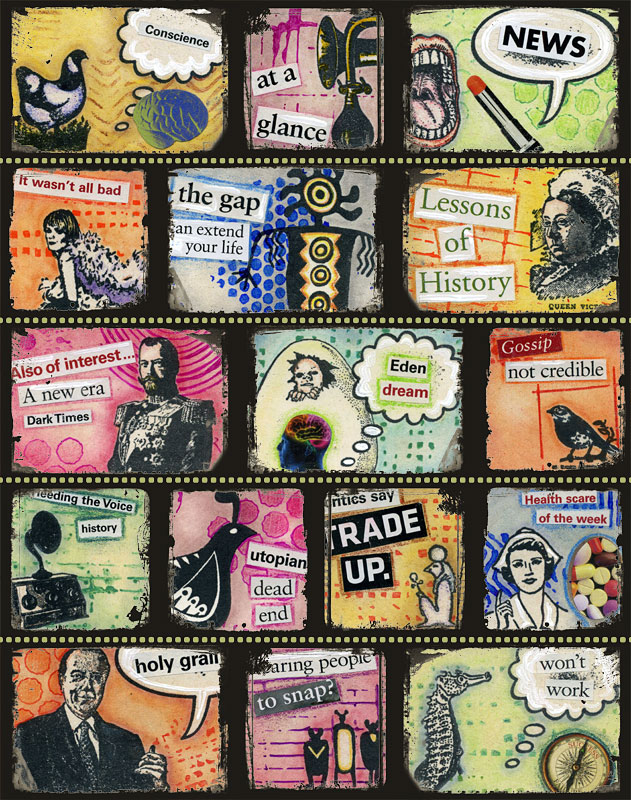
Artwork after scanning and adding a digital layer that resembles filmstrips.

I had so much fun participating in a sketch challenge recently that I decided to make an effort to enter more. RubberStampMadness magazine is currently running a Filmstrip Challenge which appealed to me. Above is my entry. There are still a few days left before the deadline if you want to get in on the fun – here are the entry guidelines.

Though I’ve been rubber stamping for well over 20 years, I haven’t done a whole lot of coloring in of rubber stamps. This project helped me to get some practice and was an opportunity to experiment with mixed media.

The first thing I did was to cut out a bunch of 2 x 2 inch and 2 x 3 inch pieces of scrap paper which would become the individual “frames” in the finished artwork. Then I stamped images on them in black waterproof ink.

The next step was to give each section it’s own background color with decorative chalks and old eyeshadow. To apply I used Q-tips, sponge tip makeup applicators and Fantastix by Tsukineko which are a great help in getting color into  tight areas around the edges of the stamped images.

Next I sprayed the paper pieces with workable spray fixative to hold the chalk in place, then I coated them with a thin layer of matte medium and let it dry. The workable fixative allowed me to brush on matte medium without the powders smearing and the purpose of the matte medium is twofold – it’s the glue I will use to attach the images and words I cut from magazines, and it keeps the markers I’ll apply later from smearing the black ink that I stamped.

The next step was to figure out words to put in the word and thought balloons I had stamped. It would be a lot of fun to tell a coherent, planned out story with this format but I couldn’t think of any ideas for a story so I did what I often do, I relied on the random and let my subconscious guide me. Cutting out pictures from magazines has been a reliable way for me to tap into the subconscious part of my brain for decades. I picked up some discarded magazines that I hadn’t cut up yet and went through them looking for words that piqued my interest. Along the way I cut out appealing pictures – some I put aside to use in other projects and a few I used for this one. I grouped the words on my work surface into combinations that appealed to me and matched the words or groups of words with images. Some of the results make sense to me, some don’t and it’s likely the ones that mean something to me won’t mean the same thing to others and vice versa. That’s one of the fun things about art!

I then glued the cut-out images and words in place by brushing the backs of them with matte medium and smoothing them in place with an old credit card. One way to reduce the risk of wrinkling the paper is to coat both sides of the pieces with matte medium and let dry before wetting the backs again to apply. It’s extra work but it’s worth it for good results. You can speed up drying with a heat tool so your work session isn’t interrupted. (It sounds funny to say “work session” – this was play!)

If you prefer instead of gluing in cut-out words you can write words in the balloons or use word rubber stamps or stickers.

My next step was to take each section and highlight the stamped images with a little color here and there and add some texture to the backgrounds with stencils from The Crafter’s Workshop. I like the way some of the textures vaguely suggest the “dot gain” effect that you often see in comic books. My coloring implements for this project were Sharpie markers and Prismacolor pencils. Both will color just fine over the matte medium but if you want to use different media, do some tests on scrap paper first to see if the surface will accept the color. I could have made masks to protect the areas I did not want to stencil on but to save work I relied on my eye to tell me where to stop. I only went onto the white word areas on a couple of spots so I decided to touch up these areas later with acrylic paint to disguise my mistakes. If you decide to sponge ink through the stencils you will need to make masks.

I glued the individual “frame” pieces down on a piece of archival cardstock with Yes Glue. Then I got out a tiny paintbrush and touched up the white areas and I liked the way the bright white looked so I added white highlights here and there all over the artwork where I thought it needed it. I liked the effect, it added a little extra “pop”.

The next image shows what my artwork looked like before I scanned it and added digital enhancements.
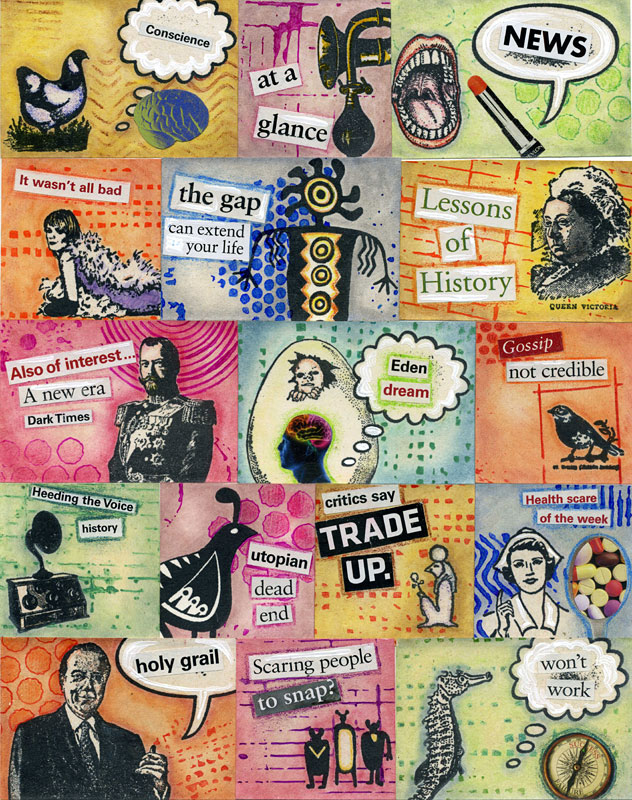
Here is my artwork before I added any digital enhancements.

Stamp credits:

Row 1, left to right: Unknown, Carolyn’s Stamp Store, Unknown, All Night Media, Carolyn’s Stamp Store

Row 2: Viva LasVegasStamps, Carolyn’s Stamp Store, Unknown

Row 3: Viva LasVegasStamps, Viva LasVegasStamps, Carolyn’s Stamp Store, 7gypsies

Row 4: Unknown, Carolyn’s Stamp Store, Chronicle Books, All Night Media

Row 5: Viva LasVegaStamps, Carolyn’s Stamp Store, Carolyn’s Stamp Store, Carolyn’s Stamp Store

After scanning in the image, I opened it up in Photoshop and added a layer for a faux filmstrip effect which I made from a couple of these free digistamps. I may print out this “filmstrip” layer on clear transparency film and mount it over the original artwork with brads or eyelets to display it.
I Haven’t Outgrown Playing With Bugs

I’m interested in invertebrates and invertebrate conservation, so I manage my garden to support a population of beneficial insects. Today while doing some much-needed garden maintenance I saw no pest species except crickets (so I thought anyway) but to my pleasure I did find these guys…

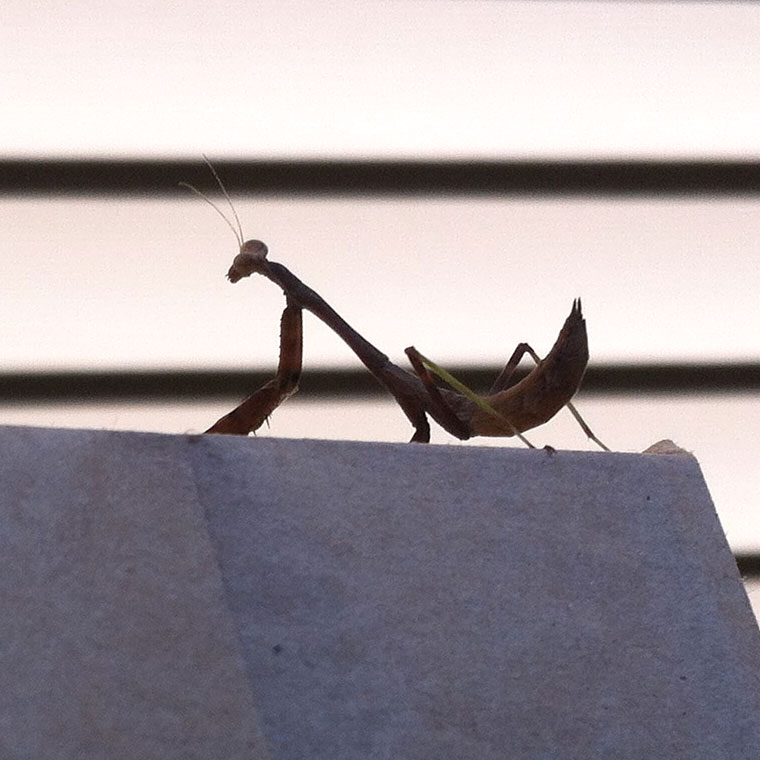
Praying mantis
Praying mantis

This individual was about 2 inches long and was mostly a mottled light brown color. The picture shows it on the edge of a paper bag that I was using to collect seeds.

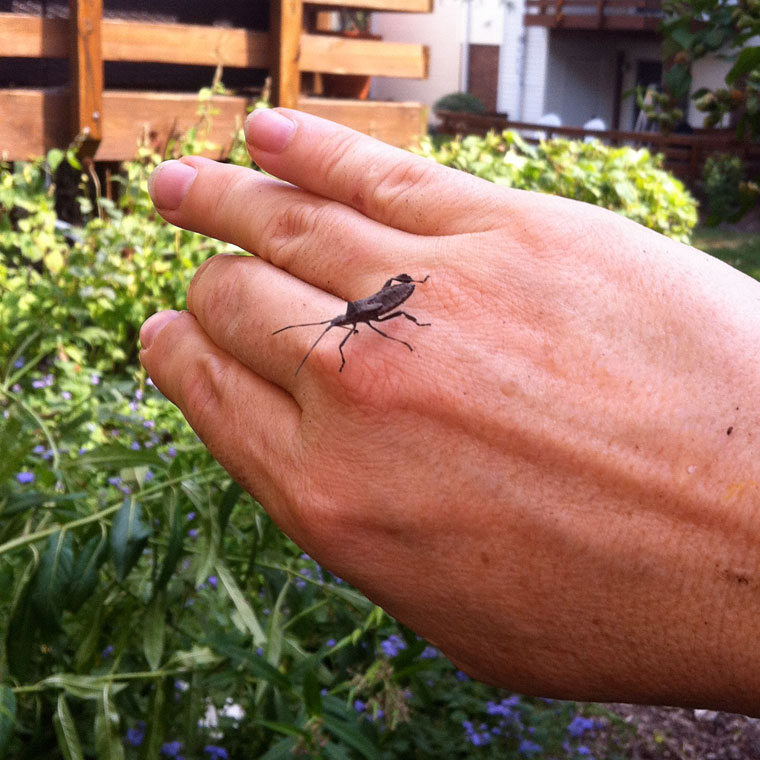
Probably a Leaf-Footed Bug

When I took this picture I was excited because I thought this was an Assassin Bug, but after looking online to try to identify which kind, it’s seems more likely that it’s a Leaf-Footed Bug. If that’s the case it sucks plant juices and it doesn’t prey on other insects like the Assassin Bug would do, so it’s NOT good to have in the garden. But I only saw one so it’s not a big deal.

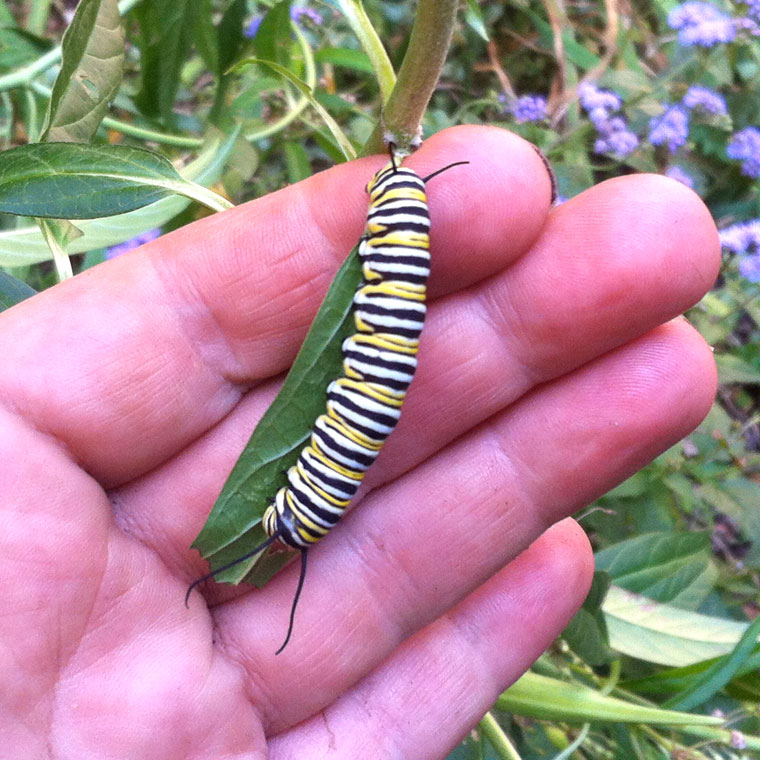
Monarch Butterfly Caterpillar

I’m so excited, my Swamp Milkweed is being used a host plant for Monarchs! I’ve been seeing a lot of Monarchs in the garden for the last month or so. I’m so happy to be not only helping feed them with flower nectar but providing them habitat for their larvae. I have Common Milkweed started in two other parts of the garden and I’m going to spread the Swamp Milkweed seed around this fall to try to grow more.

A Road Trip Journal for Dad – Part 1

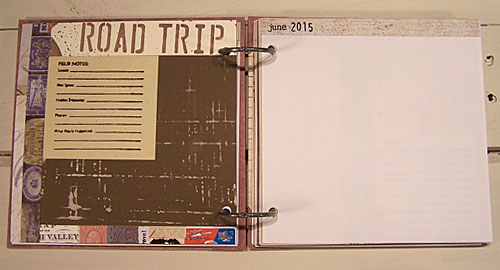
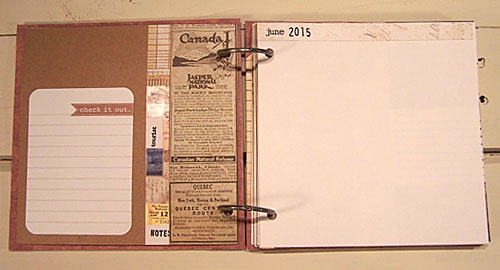
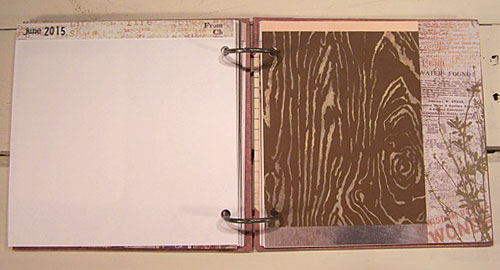
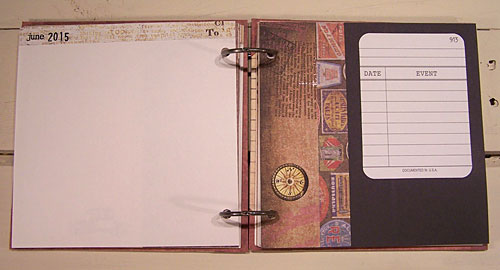
In June of this year I took a trip with my Dad to Toronto and New York City. I knew ahead of time that we would be traveling on Father’s Day, so I made a gift to present to him on the trip – a handmade journal for him to write in each day, which he did. The journal was designed so that after the trip we could add photos and ephemera and perhaps write more about our memories. I’m in the process of getting both of our photos printed so we can start working on it. I expect this will be a long term project and we will enjoy the time together that we spend on it and memories of the great trip we had. Below are photos of some of my favorite parts of the journal, as they looked before any content was added. In the future I’ll be sharing some our favorite layouts as we get them done.

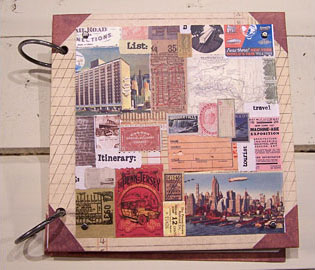
Cover of journal
Here is the front cover of the journal. It’s decorated with a collage that is protected by a piece of acetate. The small word rubber stamps are from Carolyn’s Stamp Store.
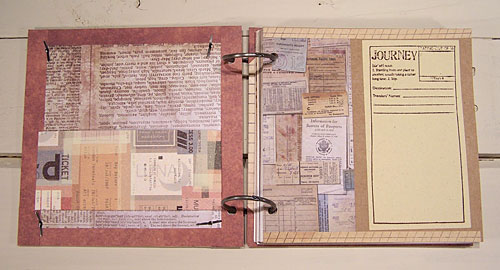
Inside front cover and first page
Inside front cover and first page. The inside front cover has a pocket for holding ephemera. The large rubber stamp on the right is from 7gypsies.
Set of two interior pages
On the left I used a trimmed Project Life card, part of the collage I made and some decorative paper. The small rubber stamps on the right are from Carolyn’s Stamp Store.
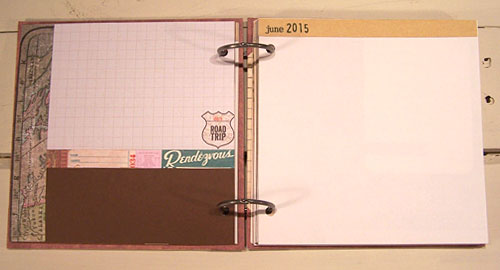
Set of two interior pages
On the left I used two different stencils from Crafter’s Workshop and a stamp from 7gypsies.
Set of two interior pages
On the left I used a Project Life card, part of my collage and decorative paper. On the right are stamps from Carolyn’s Stamp Store.
Set of two interior pages
On the right I used a stencil from Crafter’s Workshop and some decorative papers.
Set of two interior pages
On the right in addition to decorative papers I used a sticker from Tim Holtz and a Project Life card.

Here are some links to products I used to make this journal:

Months of the Year Unmounted

Year Numbers 2 Unmounted

Evocative Words II

Set of Unmounted Stamps – Journaling and Planner Words

7gypsies Medium Binding Rings Antique Brass

Tim Holtz Idea-ology Long Fasteners

Mini Road Sign 6×6 Stencil

Mini Sketch Grid 6×6 Stencil

Mini Woodgrain 6×6 Stencil

Using Sketch Challenges for Inspiration

Usually my problem is an overabundance of ideas for new projects, way more than one human being can ever do. Occasionally I need a new idea for a certain specific purpose and I find myself coming up dry. This weekend I was trying to create a new Halloween greeting card design and decided to check out some card sketches to see if anything inspired me. I made a new Pinterest Board, Greeting Card Ideas and Sketches to help me keep track of my finds.

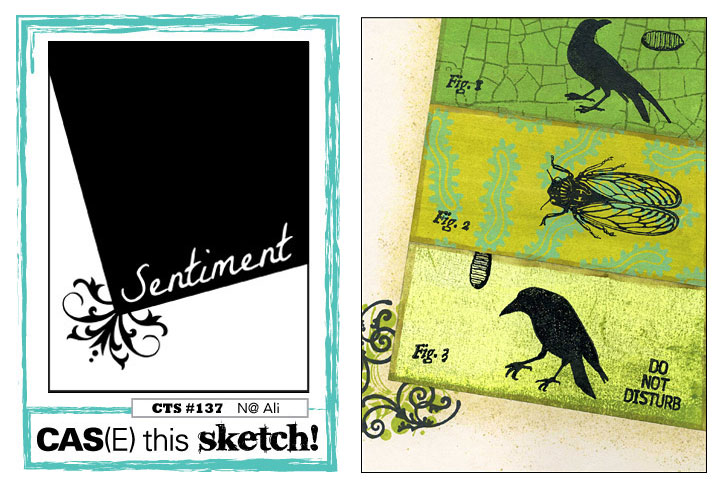
I found a lot of sketches I like on a web site called CAS(E) this Sketch! They specialize in clean and simple designs which appeal to me because a lot of times I think paper crafts that I see out there have WAY too much “stuff” on them. I’m sure a lot of people think my own designs are too spare. That’s ok, we all have different taste.

Here is my entry for sketch challenge CTS #137.

CTS #137

Making this card helped me get over my creative block and I have some more spin-off ideas that really don’t look much like this result at all, one of them isn’t even for a card, but are things I never would have thought of if I hadn’t done this exercise. That’s how creativity often works!

The rubber stamp images used in this card are from my own Carolyn’s Stamp Store, 7gypsies and Clearsnap. The small bug stamp is unknown. Here are links to some of my stamps that I used:

Cicada Unmounted

Crow Silhouettes – Set of Three Unmounted Stamps

Decor Idea Book

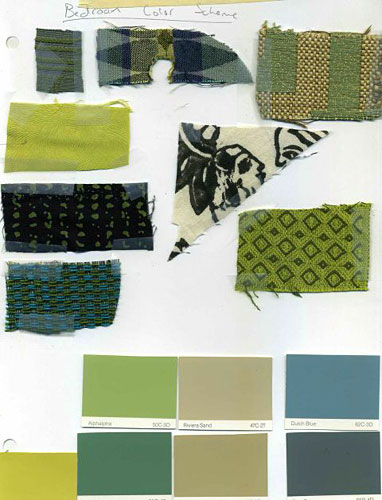
Fabric and paint swatches for my bedroom

It’s going to take years to complete the decor in my condominium – if I ever complete it. My timetable won’t work for everybody but it’s ok for me – decorating is a satisfying hobby activity and I enjoy doing as much as I can myself, for example even to the point of designing rubber stamps that I use to make ceramic tiles to incorporate into tile work.

Read more on the Schnarr’s Blog.

Scrapbooking With Small Format Photos

8.5 x 11 Scrapbook Pages
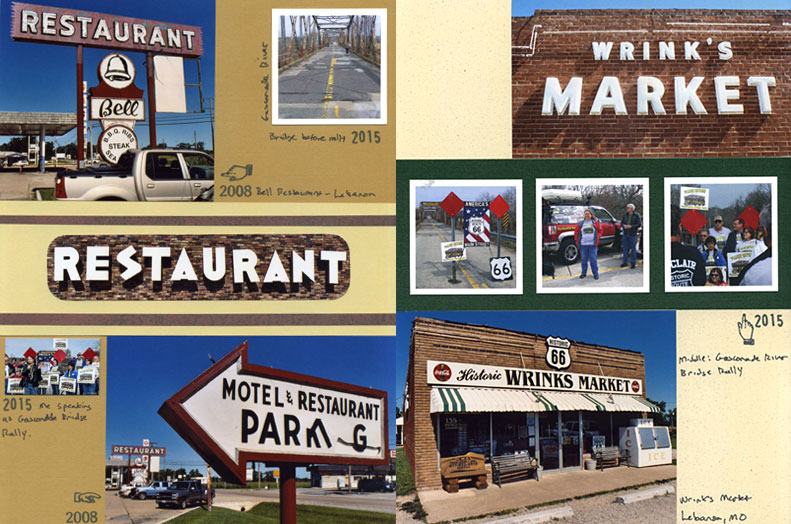
8.5 x 11 Scrapbook Pages of Route 66 Sites and Events in Lebanon, Missouri

In my tutorial “Scrapbooking My Way on the Highway” I explained why I chose an 8.5 x 11 inch page format for my Route 66 scrapbooks and described how 3-ring binders help me to arrange my photographs by geographic order rather than time order. I’ve taken a lot of Route 66 trips and plan to do more in the future, so I like to be able to insert pages from the same area next to pages from an earlier trip. This practice helps me to learn the geography of the road and to document how it changes over time.

When you mount standard-sized photos on an 8.5 x 11 inch page, you are left with a lot of empty areas to fill. This is not necessarily a bad thing because as a result there is ample room on the pages for journaling and small ephemera. Lately I’ve been experimenting with another way to fill those empty spots – with small photos.

There are online companies that specialize in printing 2 x 2 inch photos from your social media accounts. I decided to try out the services of Social Print Studio to see how such photos look in my existing albums.

In the image at the top of this article, I have mixed the white-bordered 2 x 2 prints from Social Print Studio with standard sized-photos on two scrapbook pages that show places and events in the Lebanon, Missouri area. I’m really happy with the results – these small photos really help me use the space more efficiently and the white borders look terrific on colored cardstock.

I also tried using Photoshop to make montages of photos for printing in a 4 x 6 format. This is a great way to print photos from social media that are not of a high enough resolution to print in a standard size. The tiny photo at the lower left was taken from Facebook. Yes it’s small but it’s better than not having it at all! This is a great way to obtain a bunch of small photos to fill in gaps for a very reasonable price! Just cut the montage prints apart and fit the tiny photos in among the larger photos.

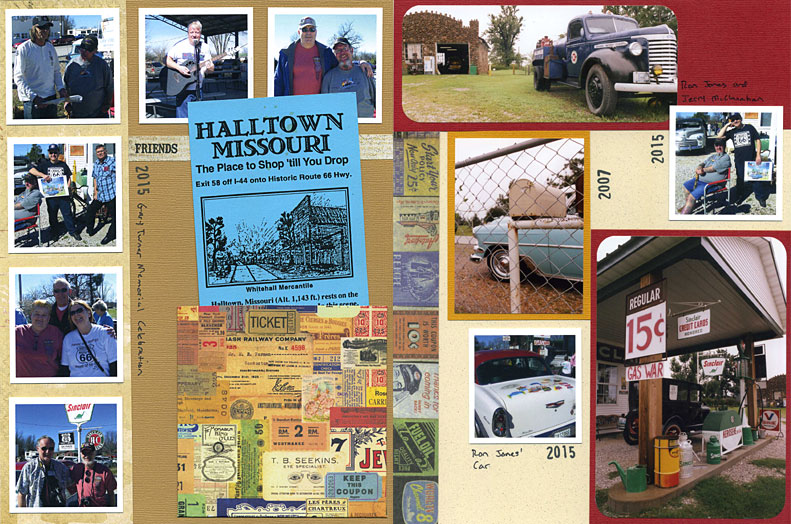
The image below shows two more pages that utilize the 2 x 2 photos from Social Print Studio. I like to mix emphemera in my albums and I have a lot of brochures and brochure-sized items displayed in pockets. On an 8 x 11 inch page, after I install the pocket there is no room for a standard sized photo but as you can see there is room for 6 small photos!

8.5 x 11 Scrapbook Pages of Route 66 Events and Locations Between Springfield and Carthage
8.5 x 11 Scrapbook Pages of Route 66 Events and Locations Between Springfield and Carthage, Missouri

If you are interested in the rubber stamps I used on my pages, here is a link to the year number stamps and the tiny hand stamps come from sets from my faux postage collection. The word “Friends” comes from the stamp set Photo Caption Word Stamps for Road Trips which was designed with road trip scrapping in mind!

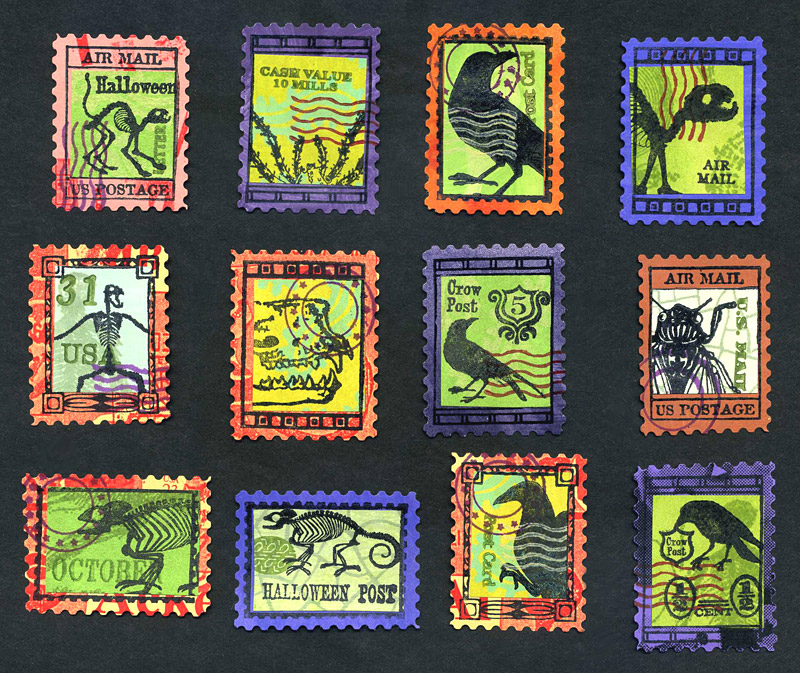
Stamping Halloween Postoids

Stamping Halloween Postoids

Yes it might seem a little early to talk about Halloween crafts – usually in early August I feel like I’m just getting used to the summer lifestyle. The Fall 2015 issue of RubberStampMadness is out and I want to let you know about it because my article “Stamping Halloween Postoids” is featured within! If you want to read it check the newsstand at your favorite craft retailer or go to the RubberStampMadness web site to order a copy. My four-page article will guide you step by step in creating your own Halloween Faux Postage stamps to decorate your Halloween mail and crafts.

I also have a selection of Halloween and Faux Postage rubber stamps available in my online shop Carolyn’s Stamp Store. I have complete postoid stamps and parts to help you design your own artistamps. Check out my newest designs featuring skeletal animals, crows, creepy bugs and more!

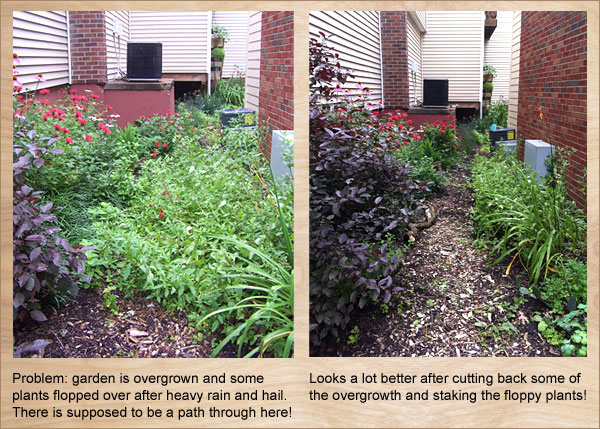
Garden Maintenance in Wet Weather

Garden Maintenance in Wet Weather

Is it raining a lot more than normal in your area? Read about how to keep your garden in good condition in my latest blog post for Schnarr’s:

http://schnarrsblog.com/garden-maintenance-in-wet-weather/

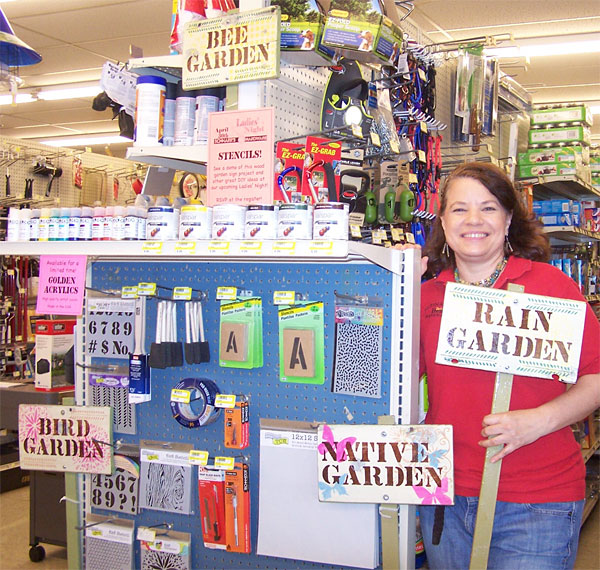
Stencil a Wood Garden Sign

Me with wood garden signs that I made along with supplies I used to make them. I'll be demonstrating stenciling at Schnarr's Ladies' Night, April 30th, 2015.
Me with wood garden signs that I made along with supplies to make them. I’ll be demonstrating stenciling at Schnarr’s Ladies’ Night, April 30th, 2015.

How would you like a practical and decorative wooden sign for your yard or garden? Stencils are handy for such a project because they are available in letters, numbers and lots of fun decorative designs.

Read more on the Schnarr’s Blog – Stencil a Wood Garden Sign