Tag Archives: self care

Stenciling plus coloring – some self “art therapy” with my Dad – PART 2

Coloring Idea #2: Rainbow Effect With Gel Pens and Colored Pencils

Experimenting with different ways to use stenciling as a base for coloring. Commercial stencils that I used to make the letter patterns are by The Crafter’s Workshop.

Sometimes when I do “adult coloring” I have a specific idea that I am trying to explore. At other times, I just want to color without thinking too much – it’s so soothing. Rainbow color gradations are a sure fire way to lift my mood. Here is how to get a fun effect with stencils, gel pens, and colored pencils.

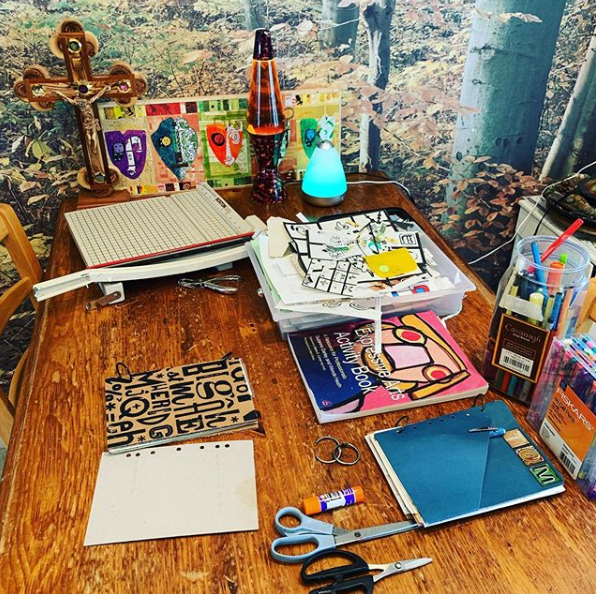
Step 1: Tape a stencil over the design area and outline with a thin, sharp pencil. For this kind of utilitarian marking I really like a mechanical pencil. It’s easy to erase and I don’t have to keep stopping to sharpen it.

Step 2: With the pencil and ruler, draw parallel lines at intervals across the page.

Step 3: Note how the pencil lines you drew divide the design into striped areas. Outline your pencil lines in one gel pen color per stripe in rainbow order. For example, I outlined the first in blue, then blue green, then green, then yellow, continuing through to pink.

Step 4: To make sure the gel pen is dry, lay a clean sheet of scrap paper over your design then burnish with a squeegee or bone folder. Lift the paper and check to see if any of the ink is coming off onto the scrap paper. Repeat if necessary until no ink is transferring.

Step 5: Erase your pencil lines. You probably won’t be able to get all the pencil lines out from under the gel pen ink lines, but the rainbow effect will still come through well enough. If the pencil lines bother you, you could go back in and touch up your work later with opaque gel pen colors, paint markers, permanent markers or the like.

Step 6: Color in gradations in pencil between and around your gel pen lines, maintaining the overall color progression in hues. There is a lot of room for creativity in how to color in this step. I choose to make the pencil colored in areas lighter tints of the hues in the gel pens and keep analagous colors roughly together. Keep experimenting and coloring until you are satisfied with the effect.

The example at the above right is not finished yet. Here are a couple more examples I’m working on of the same idea so you can see the work a little closer.

In progress: art journal page on the left, beard pieces on the right.

This is a time-consuming way to color, but sometimes that is just what I want. It requires just enough concentration to distract me from problems I want to forget for awhile, but it’s not so hard to do that I need a lot of energy. Sometimes when you’re in a crisis great ambition isn’t really there. I may or may not leave some of the background white. We’ll see!

Stenciling and oloring on art journal page
Stenciling and coloring on an art journal page. I used a hand-cut stencil of my own design plus a commercial stencil by Tim Holtz.

Bringing the coloring to Dad in the hospital

I worked on the samples you see in this article and for PART 1 both on the go and at home in order to have samples to show to my Dad. Dad likes to do the #12daysoftomsbeard project and he requested that I bring him some shapes for it to color on at the hospital. I wanted to give him a choice of coloring techniques, so I had samples of each technique ready. I had supplies on hand to cover either choice, but to streamline my supplies I only brought colored pencils as both techniques can be done with colored pencils even though I used colored markers for the first one. Dad chose the stained glass effect from PART 1 – stenciling over patches of background color.

When I brought this project to Dad, he was only a few days past some serious seizures that affected both halves of his body, but especially the left. Dad is left-handed and I was very worried because Dad’s left hand had been in a claw-like position for about a week or more. After the seizures his hand relaxed. I wasn’t sure how much function Dad would have in the hand yet, so I prepared a couple of sheets of shapes in advance for us to color, one for me to demonstrate on and one for him. I taped the shapes to scrap chipboard pieces so they wouldn’t slide around while being colored. I also brought some shapes that still needed to be cut out so that Dad could cut some if he was able.

I brought some pre-cut tags with me taped to a scrap card stock backing and also gave Dad the option to cut some out himself.

I showed Dad an overview of what we were going to do, then I offered him a chance to try cutting some shapes. He did a great job on them – with a right-handed scissors no less! I was overjoyed and a bit teary-eyed to see him doing so well. I told him this is what I want for Christmas – to see you able to do this! It seemed like a miracle compared to how he was just a few days before. For awhile I wasn’t sure if I was going to be able to ever talk with him again, much less do art together!

We used some beard shapes and holiday inspired cutouts as backgrounds for colored pencils.

I suggested some color schemes for Dad – primary colors, secondary colors, and analagous colors. It wasn’t critical that the pieces be of any particular color scheme, but when I teach a project, if I can I like to include some useful art information. I’m not a trained art therapist but I am a trained artist so I can legitimately call these activities “educational” even if I can’t officially call them “art therapy” (Darley and Heath).

I got some colored pencils out for him to cover each scheme, and let him pick from among them. Instead of covering the whole background like I did on mine, he mostly drew small shapes all over the background without covering it all the way. And instead of coloring in the negative spaces between stencil markings, he put numbers on his tags, numbers 1-11 to go along with the #12daysoftomsbeard. He was short one tag, so I’ll make a #12 later when we get to that.

In this kind of project, expressive arts for therapeutic purposes, the process is far more important than the finished results (Darley and Heath). There is no reason to try to change what Dad wanted to do if it varied from my samples. Dad has always been creative – I was so glad to see that ability is still there!

Stenciling over colored tags.
Stenciling over colored tags. Commercial stencils used to apply these patterns are by The Crafter’s Workshop.

Here I am drawing stencil lines over the colored in shapes before filling in the negative spaces with black permanent marker. The main difference between coloring over marker vs. colored pencil is that the colored pencil creates a slightly waxy surface which might resist the marker at first. To help with this, I outlined the black areas in gel pen before filling in with a black Sharpie marker. The gel pen sticks better to the colored pencil and once the outlining is done then it’s not hard to fill in with the Sharpie.

Embellishing with sequins and squeeze paint
Embellishing colored pieces with punched paper shapes and sequins.

I have started embellishing some of the pieces that we colored with punched paper pieces, glued-on sequins and little dots of squeeze paint to go along with the stenciling.

Caption

When #12daysoftomsbeard starts on December 25, we’ll have a good selection of items to display on the beard. Hopefully people will send us more parts as a challenge to incorporate each day. The first year we did this activity, in 2019, I started out by clipping little pieces of paper to Tom’s beard with tiny clothespins. To keep things interesting, we’ve been gradually elaborating by making little garlands, involving Tom’s glasses, adding found objects and props, incorporating parts of the background, using far-out creative filters and more.

What will happen?

Some of my favorite #12daysoftomsbeard pictures from 2019-2022

Above is a commemorative artistamp sheet I made to show off some of my favorite beard pictures from the first three years we did this project.

Works Cited and Recommended Reading

Darley, Suzanne and Wende Heath. “The Expressive Arts Activity Book: A Resource for Professionals”. Jessica Kingsley Publishers, 2008.

Two upcoming art shows

“Nourish” virtual exhibition by Art Saint Louis

Art Saint Louis is having a virtual exhibition on their web site, from July 1 – September 1, 2022. I have had one piece selected for this show so I’ll be in it along with 25 other artists.

(all the) Feels show at Art Saint Louis

I’m also in an upcoming gallery show at Art St. Louis called “(all the) Feels”. It runs from July 30 – September 8, 2022. The opening reception is August 6 from 5-7 pm. One of my collages was selected for this show.

For several years I had pretty much given up on producing “fine art” pieces, even though I still had lots of ideas. The main reason was that my time seemed better spent making more craft-oriented things that helped promote my Etsy shop, the blog posts I was writing for Schnarr’s Hardware, or the teaching I was doing at the time. By then, life had taught me several times over not to put all my eggs in one basket when it comes to making a living. I was trying lots of things to see what worked and what didn’t.

In the fall of 2019 I started working on a Master’s Degree at Webster University in Advertising and Marketing Communications. My reasoning for studying communications is that art is a form of communication, and in addition picking up more knowledge about communications can make any of my activities more successful.

My communications classes are fascinating, absorbing, and creatively satisfying, but I cannot help but be jealous of the art majors. Many of the topics I study in communications are serious, and although art can also be serious it also can be pure play and I need some of that! My undergraduate degree is in fine art. Shortly after starting my studies at Webster University, every now and then I would walk over to the art building to see what the students were up to and to find out if there were any art shows that were open to all students and not just art majors. I found two in quick succession and to my great joy made new work and was accepted into both shows. One show was meant to be one night only, and the other show, “Back To Our Roots” was intended to be up for some time but was shut down early twice, the second time due to the beginning of the COVID-19 pandemic.

I’m about halfway finished with the Master’s degree right now. I’m using the skills as I go, so I’m not putting undue pressure on myself to hurry to finish. Also I have taken a break due to tragedies in my family at the end of last summer that caused severe grief and trauma that are still greatly affecting my productivity. I’m going to resume taking classes again when I’m sure I can handle the course work. I’m getting there, but there are setbacks along the way that cause me a lot of frustration, as well as to other people who want or need something from me. I feel really guilty when I turn down any work that people want, or set any kind of boundaries. This inappropriate guilt causes me a great deal of distress that I’m trying to work through, but boundaries are necessary sometimes so that I can get my trauma symptoms under control. The art piece of mine that the judges selected for the “(all the) Feels” show is about this discomfort and guilt. It contains parts that I began earlier for a different reason, but that is what the final result is about.

One of the best ways I know to process difficult and complex feelings is to make art. So this spring I joined Art Saint Louis and have been making more art to enter into their shows. I’ve been in a few of their shows in the past but was never a member before. A friend asked me a few weeks ago why I was doing this – we were at a party, so I didn’t want to explain at that time and place that I was kind of doing it as therapy. Yes, entering shows is good for promotional purposes for myself and my work, I can practice and improve my communication skills, I might get a sale, I might even win a prize which would be good for my show history. But much more important to me is motivation to finish some pieces so that I process what is going on inside me. I’ve been through some life-changing events and personal turmoil, as many of us have. Yes the resulting feelings and symptoms are unwelcome and difficult, but I can’t just wish them away. I have to process them, and art is one of the great gifts from God that I’ve been blessed with that helps me do that. I am very grateful for the opportunity to express and exhibit.

More information about Art Saint Louis:

Web site: https://www.artstlouis.org

Facebook: https://www.facebook.com/ArtSaintLouis/

Twitter: https://twitter.com/ArtStLouis

Instagram: https://www.instagram.com/art_st_louis/ or @art_st_louis

YouTube: https://www.youtube.com/user/ArtStLouis

Art Dialogue Blog: https://artstlouis.blogspot.com/

Links to examples of some past and present fine art and design work of mine:

Graphic design and art portfolio on Facebook

Pinterest – Carolyn’s Art and Design

Pinterest – My Ceramics

Pinterest – My Old Artwork

Etsy – Art and Crafts by Carolyn (yes I’m planning on expanding this section more as I get time to do it!)

Easy Thank You Cards

Rubber stamps by Rubber Stampede (Thank You), Hero Arts (flowers) and unknown (passport stamp collage).

My Dad and I are making Thank You cards following the funerals of my uncle Dave and brother Larry. Tom helped a lot too with the gluing. I’m feeling the effects that a lot of people feel after serious grief and trauma: disrupted sleep, fatigue, brain fog, joint pain, muscle pain, etc. These symptoms are normal for some people after trauma and severe stress, apparently, but of course make everyday functioning relatively difficult for a time. A bike ride on Sunday with friends helped a lot. I asked Tom to be my coach and help encourage me to do the ride. He pumped up the bike tires and pumped me up emotionally and took a hot epsom salt bath with me before we got dressed for the ride to help loosen up my stiff and sore body. With that I didn’t need any pain meds like ibuprofen which I had taken from time to time the previous week. He helped me break through a big barrier and function better. I was really discouraged and scared by how sore I was and how bad I felt. I’m very grateful to have a loving husband to help me get over some rough spots and build on little victories to gradually improve over time. This is extremely hard even with help. I hope and pray that people out there who need support can get it from somewhere. As I find grieving and mental health resources online I’ll keep adding them to my self care Pinterest board.

In the meantime, Dad and I are extending the effort to make cards because we have abundant supplies on hand we enjoy using and we find the activity healing and therapeutic. But with not feeling terribly well I had to come up with a card design that was relatively simple so that we would not tax ourselves beyond our current abilities to make them. They are just challenging enough to force us to concentrate a bit but not so hard we want to give up in frustration. I have to take a lot of breaks, but I’m not giving up! Of course if you want to make your own similar cards you could use any suitable sentiment in place of “Thank You” to fit any message you want to send.

Supplies You’ll Need

Blank cards with envelopes – Dad had a whole bunch of envelopes in different sizes already on hand, so we cut plain white paper to the envelope width and folded the pieces in half to fit. If you prefer, you can buy blank cards with matching envelopes at craft stores.

Assorted papers in light, neutral colors for the two largest areas on the card, with subtle patterns on them. The design on the paper should be light enough to stamp on in medium to dark colors.

Assorted papers in more contrasting neutral colors and patterns for the narrow stripe on the front of each card.

Rubber stamping ink in a “harvest gold” color, a taupe color, and black.

Clean scrap paper to help with gluing

Optional – interesting die cuts, design tape (also known a paper tape or washi tape) and stickers for extra interest

Tools You’ll Need

Paper trimmer

Metal ruler for tearing paper

Scissors

Glue sticks

Squeegee, bone folder or burnishing tool

Rubber stamps. My friend Kate recently gave me a large collection of pre-owned stamps. I will gradually be offering some for sale in my online shop as I have time to get them listed. I did set aside some of my favorites to keep for my own collection (of course). To start out my Dad and I selected for these cards two Thank You stamps, two postage related designs, and three wildflower silhouette stamps. Unfortunately I’m not selling the exact stamps I used in this card because I really love them and there were no duplicates in the pre-owned collection Kate gave me, but you can use similar stamps in their place.

Instructions

  1. Glue a narrow strip of paper that is from the higher-contrast selections about 1/3 from either the left or right from the side of the card.

2. Cut and tear out pieces of paper in light neutral colors with subtle background patterns and glue them to the fronts of the cards on either side of the strip you glued down previously. I tore the edges that overlap the central stripes for visual interest. On some of the cards I added some stickers and design tape for a little extra interest if I thought it was needed. As you’ll see in the final graphic featuring variations on the original design, I added some hexagon die cuts I had made some time ago. When I was designing the prototype card, I asked Dad to pick out stamps he liked from my collection, and he also took out these hexagons, so I looked for ways to use a few and I liked them on some of the cards. Trim the paper to the edges of the card front when done gluing.

3. Stamp three flower stamps on the wider background side of the card in harvest gold or similar ink color. My Dad switched to a red-brown ink later in the process which also looked very good.

4. Stamp a Thank You stamp in black, and if you think the card needs a little more interest, stamp postage related designs or some other accent stamps of your choice in a taupe ink color as in my example at the top of this article. You might decide your card needs more or less done to it depending on what background papers you choose. See the graphic below for a bunch of variations that we made.

Here is a collage of some of the cards we made showing how many different ways you can use the same stamps. The additional lower case thank you stamp you see here is by Tim Holtz. Dad did most of the stamping and decided some of the cards didn’t need so much on them which is a fine design choice you can make when the papers are interesting. If you would like to download a high-res version of the above graphic (with more designs on it) to use in projects like stickers or faux postage sheets here is a link:
Printable Thank You Graphics

Additional Resources:

My Pinterest board for Greeting Card Idea and Sketches

My Facebook album for free coloring and paper crafting downloads

With more time and energy, I probably would have created a card that uses stamps that I actually sell, some of which I designed. For now the important thing was to make something nice that is also fast and easy. But if you want to browse my collection of stamps in my Etsy shop here it is: Stamping

Memory crafts needed in a hurry plus mourning in a social media age

Trigger warning: this blog post deals with the topic of suicide.  Please get professional help if you are suffering from mental health issues. If you are afraid that you might harm yourself, please call 911 or a suicide hotline immediately. Here is the National Suicide Prevention Lifeline phone number – 1-800-273-8255.

Knowing how to make memory craft projects and having memory craft materials around is most helpful when going through something like my remaining family and I just went through. My uncle Dave was discovered deceased on August 27, 2021 and my brother Larry died from suicide on September 4, 2021.

I think some people were taken aback that I was open about my brother dying from suicide almost immediately after hearing the news. No one gave me flak over it, but I do think a few people were surprised. I did ask my Dad for permission before I posted the cause of death. My Dad and I are the two remaining from our original nuclear family of four.

There are reasons why I wanted people to know the truth right away. For one thing I wanted people to know exactly what horror we were dealing with because it’s not likely that our lives will be “back to normal” any time soon, if ever. We will be needing and asking for some leeway in meeting some of our obligations as we try to figure out what our lives are going to look like now and decide how to prioritize tasks.

Another reason is that my brother fought to overcome bipolar disorder for over 20 years, and my late uncle did as well. My brother’s illness affected our family greatly even well before it was diagnosed because there were serious symptoms that made all of our lives challenging at times, even if we didn’t yet understand what they meant. I have done volunteer work from time to time over the years to help people with mental illness, mental disabilities, or are just going through a tough time as the result of a normal grieving process. In the past I taught workshops at the former Open Door Art Studio and a few years back I donated a few days work and a lot of supplies to Artists First studio with the hope of someday doing more work there. When the COVID-19 pandemic started, my husband Tom and I did a series of eight webcasts we called #virtualartparty to help people enjoy art and craft activities to help avoid mental health problems that could result from anxiety and isolation.

I knew my brother’s suffering had increased quite a bit over the last few months. I tried to show I cared and encourage him a little by doing a couple of “art therapy” projects with him and my Dad, and with a few other people who were also going through a hard time. I was planning to do more whenever I was able. I put “art therapy” in quotes here because while I’m a trained artist I’m not a formally trained art therapist – but since all art is therapeutic, my philosophy is it’s better to do something than nothing. Even if it doesn’t work, at least you have tried. And a few minutes of distraction from misery is better than nothing as well. I have to look for something good where I can in order to go on.

Making self-care cards out of Project Life cards

Art Journaling By Selectively Covering Text

I have been through a course of therapy myself to recover from an abusive relationship and the resulting serious trauma. Even though I have great empathy for sufferers I know there is a limited amount I can do to help someone else recover from severe mental illness. My Dad and I know we tried everything that we could think of to save our loved ones but we could not do it. Dave and Larry were both under medical care and as far as we know fighting hard for many years. Our help and the work of many doctors and therapists was not enough to save them. I’m grateful for the people who can be saved and sad about the ones that can’t. There is a need out there for compassion and understanding to aid others in helping their loved ones with mental illness or consoling them if the outcome turns out tragic. That’s something I can help with in a little way perhaps by writing about it and continuing to make small contributions to the general cause of mental health whenever I can. I think dealing with reality head-on is more useful for this goal than trying to cover it up. I feel devastated over what happened but it’s based on sadness, not shame. I don’t want other mourners affected by mental illness or suicide to feel shame either. So I’m trying to contribute by setting an example of frankness and truth. I am not judging others who choose a different way – we all have our reasons for how we grieve and how we process our situations.

It comforts me to try to find answers and explanations to find meaning in overwhelming situations. Right now I’m more consumed with questions than in a state of readiness for trying to find answers. That’s where the memory crafts come in. I made a few things for the funerals in a hurry, which served the purposes of mourning the dead, comforting others, and providing a needed distraction and creative outlet for myself to help me cope. Following are some pictures. It’s my way to mark just about any important occasion with art and crafts – both celebratory and mournful.

fishing related craft items plus lures
Fishing related craft items plus lures. Uncle Dave was cremated so I was asked to make a box to temporarily cover the plastic box of ashes during the mass. I was inspired to make a fishing themed box for several reasons. One, as Christians, I liked the allusion to Jesus asking the apostles to be join him and be “fishers of men”. Is there a way to use this tragedy as a way to bring God’s love to people? Another reason is that fishing was one of his main activities if not THE main activity he loved, and it broke my heart that when we went in his house all the items for a future fishing trip were ready by the door – poles, cooler, pliers, tackle, etc. I wish he had been able to go on his planned trip and many many more after that. Another is that although I don’t fish I love to be on water and one reason I do Operation Clean Stream is so that people like me and Uncle Dave and everyone who enjoys the outdoors can have clean, healthy streams. So that is something I felt a connection with him through – nature and water. Two of the lures I used I found in the Meramec River while I was doing stream cleanup, and the other lures I used were Dave’s.
wood panels for box
Wood panels for box after being painted, sanded and assembled.
Finished box
Background for Dave's photo board.
Background for Dave’s photo board. When I started Dave’s memorial projects, I thought I was going to have a lot more time to work on them. Unfortunately my brother also died before we could have Dave’s funeral, so some of that time went for planning Larry’s funeral also. Dad and I glued on the papers for this background from a selection I had already picked out to harmonize with the box. We used medical tape that Tom had around on the edges because we didn’t have time to shop for anything else. Fortunately, it was the right weight and texture and looked good. Because of our grieving and hasty preparations, I actually wore a dress with no underwear because I forgot to bring extra and using one of my brother’s ties as a belt because I forgot one to the first funeral – but we got by. With all the shock I’m proud of us for just functioning. We had a lot of great help too – we are very grateful. We believe prayer works and we know lots of people were praying for us. We also know how much we were helped by people’s kind actions. For example my husband Tom took two weeks off from work to help us. We are most indebted to him and others for their kind deeds.
Larry's photo board #1
Larry’s photo board #1

We used the same tape on Larry’s boards but I painted it a black/bronze color before we started gluing down the torn paper. This is only a tiny percentage of all the photos we would have liked to show but Larry’s friend Tim and others helped put together a digital slide show as well that was greatly appreciated by all of us.

Larry's photo board #2
Larry’s photo board #2
Larry's photo board #3
Larry’s photo board #3

Links to more information:

Dave’s obituary

Video of Dave’s mass

Larry’s obituary

Video of Larry’s mass (partial, but they got the homily which was excellent and appropriate)

Larry’s memorial Facebook album (in progress)

Art Journaling By Selectively Covering Text

Sometimes I find and save advertising materials printed on nice paper. I might like part of the imagery, or be attracted to the weight and feel of the paper, or both. It’s sometimes less intimidating to start an art journal page on paper that already has something on it than a blank piece of paper. In this article I’ll show you two ways to creatively alter found papers with text on them.

Tools and Materials
Assorted found papers and scrap papers
Clean scrap paper
Stencils
Markers and other drawing and coloring implements of choice
Painter’s tape or masking tape
Scissors
Glue stick
Burnishing tool

First, select a piece of paper with text on it, and a stencil. Tape the stencil in place over the text. Using the marking implement of your choice, outline the openings in the stencil only in the spots where there is text to cover.

This results in an interesting effect. The text turns into a texture rather than something you read, and the resulting graphic effect might suggest what to do next to finish the composition. You might decide to color in some or all of the outlines you just traced over the text.

In the example above, since I’ve used permanent black Sharpie markers, I can use almost any medium I want to add color if I want to.

There is no need to restrict yourself to using a black marker. My brother got off to a very good start on this page. He took advantage of the pale text to use colored Sharpie markers. If he wants to work on this page more it has a lot of potential. Note: my brother died about three weeks after making this page. I don’t know if I’m going to add to it or keep it as is, but it’s in my art journal.

I have a real weakness for amoeba shapes and any graphics that suggest mid-century modern imagery. I cut these blocks of text from a magazine because of the pretty shapes and colors backing some of the text.

The article I took these cutouts from was about work-life balance. There are some words in these paragraphs that would be good to have in my art journal, which I use as a self-care tool as well as for creative expression. I covered up the words I didn’t want to see with strips of scrap paper and left exposed the words I did want to see. When the glue was dry enough to handle, I trimmed the shapes. Toward the end, I got tired of gluing paper strips and for the last few lines I wanted to cover, I used a yellow opaque paint marker to finish off these pieces.

Some people compose prose or poetry this way, by removing words instead of writing them to make new compositions. In this sample I was mainly interested in making a visual statement, and I treated the words as random elements. But if you wanted to, you could make a carefully considered visual AND literary statement by selectively covering words.

Here is a two-page spread using both techniques from this article together. I think these two pages are almost complete. I’ll think about them for awhile before doing anything else to them, if I decide they need more.

It helps that these two found pages here were already strong graphically, which was part of the reason why I was attracted to them in the first place.

More Examples

Following are more art journal pages that I started by selectively covering text. Enjoy!

Art Journal page
Art journal page. I covered up the light-colored text with vertical lines in gel pen. Then I used more gel pen, color pencils and a white paint marker to finish it off. The abstract stencil is one of my own design, the tree with birds stencil is made by The Crafter’s Workshop – it’s for sale in my Etsy shop.
https://www.etsy.com/listing/1142360780/mini-cherry-blossoms-6×6-stencil
On this art journal page, I partially covered the text by stenciling with black marker to make the text into a texture instead of something readable. Then I drew through more stencils with a mechanical pencil then colored in around the pencil marks. All four stencils used here are by The Crafter’s Workshop.
Art journal page with stenciling and coloring
I used a stencil that I cut myself and a commercial one by Tim Holtz on this art journal page. I made hatch marks blocking some of the text as part of the design. I blocked out some of the text with gesso and correction tape. I had fun playing with making the text cover-up part of the mark-making.

Every art journal page doesn’t have to be a masterpiece

I’m happy with how this two-page spread for my art journal turned out, even though it is kind of messy. Sometimes in the morning Tom will make the coffee before leaving for work and often he’ll leave a love note for me with good wishes for the day if I’m not awake yet. He uses paper left over from me printing out shipping labels for my online store. The leftovers just happen to be the size of my journal and planner pages. I punch holes in a lot of them and write on the other side when I want to take notes or record thoughts. Often either he or I will get coffee stains on the notes as you see here. Since I’m not starting with a pristine piece of high quality paper, there is no pressure on me to make a craft demo worthy effort every time I use these to make an art journal page. I did however greatly enjoy using stencils and stickers in the rough but satisfying example shown above to record a few thoughts about sharing morning coffee with my loved ones and having a healthy weekend.

In my last blog post, I wrote about the acronym G.R.A.P.E.S. and how the G stands for “Be gentle with yourself”. One way to do that is to take a little time to journal and let yourself off the hook if it doesn’t look like a brand ambassador did it. The activity itself is beneficial in many ways.

Stencils and stickers are real time savers when you want to slap something together without having to make a major art or design statement. I have a lot of supplies, but also I have a basic portable kit that includes some of my favorite stencils, a folio of colored pencils, gel pens, a few planner-friendly design tapes and some basic pencils and markers for writing and outlining. There are a few frequently used paper crafting tools in that kit like a burnisher, glue stick, hole punch, scissors, ruler and utility knife for cutting and sharpening pencils. I can get a lot done with that kit, and if I want to add more to the pages when I’m home, I have many more paper crafting supplies I can utilize.

The stencils I used in the two-page spread above are available in my online shop:

Mini Script Words

Mini Word Association

Mini Coffee Splotch

Mini Home Sweet

I have a couple of Pinterest boards full of more of my own examples along with samples, inspiration and tips from others on the topics of Art Journaling, Planners, Albums, Homemade Books and Scrapbooks. Enjoy!

Art Journaling

Planners, Journals, Albums, Scrapbooks and Handmade Books

Making self-care cards out of Project Life cards

I know several people who could use some encouragement right about now, including myself. I decided this week to get out my paper craft supplies to have a bit of creative fun and make supportive cards to use and more to give to people I know.

First I’ll explain what both self-care cards and Project Life cards are. Self care could be considered the practice of maintaining your physical and mental health in order to prevent burnout and breakdowns. While looking for some resources for my Self Care Pinterest board that I use for reference, I found some specifically aimed at caregivers of different kinds. Even if one chooses from their own free will to be a caregiver, it’s still a tough job. As these resources I found mention, one should not feel guilty for practicing self care even if you are naturally inclined to be giving – a burned out or broken down person is not in a good position to help others. We are able to be of much better service when we are strong. We are often socially engineered by individuals and institutions to sacrifice our own agency to serve interests not our own or of our own choice. I think it’s a beautiful thing to voluntarily share but not to be manipulated or coerced into it. The latter is just being a victim of people who choose to live a parasitic lifestyle.

So what are self-care cards and where do they fit in? There are many types of cards with different information that people have used over the years as reminders or teaching tools. Small cards are portable and fit in a wallet, a planner, a journal, a pocket or wherever so that you can access reminders on the go or wherever it’s convenient. When learning new life habits we might need a touchstone of sorts to keep us on track. Self care cards are just cards with self-care content. They can be purchased, downloaded for printing, or handmade. I often like to use a combination of desktop printing and paper crafting methods to make or decorate self care cards for myself.

What are Project Life cards? Project Life is a commercial product developed by designer Becky Higgins intended to make scrapbooking and related memory crafts easier and less time consuming, and to relate the activity to living well and positive personal goals. Pocket scrapbooking is a generic term for using clear pocket album pages to organize cards and various paper items. Like a lot of people, I picked up the modern form of the hobby of scrapbooking in the 1990s. When I first heard of pocket scrapbooking I was intrigued and purchased some cards to use in conjunction with with my “conventional” scrapbook pages and also in other paper crafts.

Several years ago I purchased the Project Life Cinnamon Core Kit and the Road Trip Theme Pack. These sets featured lots of colors I used a lot, and graphic themes that were complementary to a number of products I already owned.

I’ve used a lot of the cards in scrapbooks and other paper projects over the years but still have a good quantity left. Because some of the Project Life cards feature positive messages and others contain grids or lines to help with journaling or record keeping of various kinds, they are well-suited to use as a base to make self care cards. If you want to make these of course the bases of your cards don’t have to be specifically from Project Life – a variety of products could be used.

One activity that I learned a few years back from a depression support group web page is the acronym G.R.A.P.E.S. It stands for:

  • Being Gentle with yourself
  • Relaxation
  • Achievement
  • Pleasure
  • Exercise
  • Social

The idea behind using this acronym is to try to do one activity on the list from each category every day. From my own experience and from what others have told me who have tried it, even if it isn’t possible to do each category each and every day, striving to do it and tracking the activities each day to make sure one is continually improving does result in better mood and health. It helps you “social engineer” yourself into having a better life. This is anecdotal information of course, but if you delve into scientific research on mental health you will find out why it’s effective. In this project, I’ll show how I made self care cards track the use of activities from the G.R.A.P.E.S. categories. I put more “decoration” on these cards than is strictly needed but it’s fun to use up paper scraps while making cards that fit my own personality. And paper crafting itself is a great way to get the Pleasure “task” checked off for the day!

paper crafting materials

Tools and Materials

Project Life or other cards
Scrap papers in harmonious colors
Scissors
Paper cutter
Glue sticks
Thin markers in black and colors harmonious with chosen color scheme
Small letter stencils
Small letter stickers
Assorted encouraging stickers, die cuts, paper scraps featuring helpful sayings or sentiments, or other appropriate embellishments
Rubber stamping ink – black and harmonious colors
Rubber stamps
Hole punch
Cord or string to loop through hole

First I added paper scraps to the existing Project Life cards I had whenever I wanted to make the existing designs more to my taste. Mostly this consisted of adding paper scrap strips to the borders on some of the cards, leaving the grids or lines in view. Some of the cards were fine the way they were.

Next I assembled a variety of letter stickers from my collection that spelled G.R.A.P.E.S. For more variety, I drew some letters with marker through alphabet stencils and cut those pieces of paper out. I added the letters G.R.A.P.E.S. along the side on on side of the card. Since these cards came with designs on both sides, I used the other sides for spaces to take notes, or for making a mini encouraging collage with stickers and paper ephemera.

When necessary to make a grid to keep track of activities, I added vertical lines with thin markers.

I punched a hole at the top and added some string with a lark’s head knot so that I can use these cards as bookmarks also.

I thought some of the cards needed just a little bit more added to make them looked finished, so I stamped here and there with assorted rubber stamps and added a few more stickers.

As I complete daily activities that fit one of the G.R.A.P.E.S. categories, I’ll put a checkmark in the proper spot on the grid.

Additional Resources:

My article "Self-help Techniques for depression"

Link to a PDF file I made with motivational quotes and graphics with the letters G.R.A.P.E.S. for printing out

My Self Care Pinterest board

Art Journaling Pinterest board

Pinterest board of Planners, Journals, Albums, Scrapbooks and Handmade Books

Scrapbooking Page Sketches Pinterest board - includes a section on pocket scrapbooking

Homework, art journaling and stencils!

Art journaling is an activity that helps me a lot with self care, artistic expression and just general management of life. Lately I’ve been experimenting with combining some artistic expression with material I’m learning in Social Engineering class. There are a lot of acronyms and concepts to remember – things that lend themselves well to bullet journals, art journals and chart and graph type graphics.

These pairs of pages you will see are in progress. I made them to have something to do adult coloring and other paper craft based activities on when I want to relax and be creative for a bit. As I work I can study and memorize the “bullet points”. I’m going to erase some of these pencil lines as I go. For a couple of the more complicated layouts I made drawings on tracing paper and chipboard templates to help cut the paper pieces to the right sizes and shapes.

Some of the stencils I used are commercial products I sell in my online Etsy shop. If you would like to see the selection, it’s at this link: Stencils and Stenciling Supplies.

I hope these pages in progress will give you some ideas for organizing information in a creative and fun way!

Two-page spread for MAPP – Mitigation and Prevention Plan.
Here is a pair of pages I began to create my rendition of “Curtis’ Triad of Disruption”. I love geometric shapes, and trios. This will be fun to work on!
I finally finished “Triad of Disruption” on 12/30/22! I did a couple of things a bit different than I planned.
Social Engineering Pyramid two-page spread on tracing paper and then started in the art journal.
Finished coloring these two art journal pages.
Finally finished coloring these two art journal pages.

The Comfort of Old Fabrics

Arkansas snowflake quilt being repaired
My friend Kate, who is a quilt expert, found the name of this quilt pattern in an old quilt book of hers, and gave me some repair tips too.

There are personal, regional and world-wide reasons why the last few weeks of life have been especially difficult. I’m not the only one who seeks solace in art and craft activities, especially ones that bring back warm memories of cozy winter afternoons spent with my family making things. There is nothing better on a cold wintry day.

It’s been nice snuggling under the old family quilt my mother in law gave us recently. It was made in the 1930s by my husband’s grandmother and friends. I was given it in the hope I’d make something from it, since it has a few areas of damage and I’m well known for making new things out of old things – a lifelong pursuit. I decided to repair some of the spots before it gets worse, because most of it still looks good and for now I’d prefer to use it than upcycle it if possible.

Patching damaged star points with applique.

I could have purchased fabric for repairing this quilt that matches more closely to the old fabric to disguise the repairs more, but I decided to approach this repair as adding a little of my own history to this quilt instead of trying to do a museum quality restoration. I looked in my extensive fabric stash to see how close I could approximate the colors and patterns with what I have, and decided it still looked good and I would enjoy the little differences and the memories from my fabric scraps. My Mom made me a tablecloth out of that multicolor floral print on the right in the early 1980s, and Kate gave me the blue floral scraps, for example. Every time I see the fabric I will remember them and others, that is one of the best things about quilts and quilting. This repair is very satisfying to work on because I’m adding memories and functionality as I go.

Old quilt my Dad gave me, being washed on the left and after washing on the right.
Old quilt my Dad gave me, being washed in the bathtub on the left and after washing on the right.

My Dad recently went through some things in his basement, and he had an extra quilt that someone gave him so he passed it on to me to clean and repair. It doesn’t have any holes that go all the way through and very few torn patches so we’re using this one until the other repair is finished, then I’ll swap them out and repair the second one. I really get a kick out of these colors and patterns. They look to me like they are from the late 1940s or early 1950s.

I’ve been putting my toe in the water of learning quilting over the last two or three years. I have two art quilts in progress and one baby quilt. Kate is giving me tips as I need them. Repairing quilts is a great way to increase my skills along the way.

old_softies

In the above photo are some stuffed animals and little pillows I made in the 1970s when I was around the ages of 8-12. The rooster on the right was made from a commercial pattern that my Mom had in her stash and I think I still have it. The others were made by me from my own patterns – I’m not sure about the frog though. That one seems a lot more advanced than the others. It even has wire in it to make it poseable. Well, it probably is mine – it’s not symmetrical and I cut a hole in the back of the head to insert the wire and sewed it back up again, so that was probably an afterthought. The items on the right were recently extricated from my Dad’s basement and I had completely forgotten about most of them. I pretty much liked a lot of the same animals then as I like now – sea life, fish, invertebrates, birds, frogs! I loved little pillows with pockets, then and now! I felt very satisfied when I made these, and I love looking at them now for the memories of where those fabrics came from and how much fun I had. Maybe I’ll make some of these into patterns for kids – that’s one way to make sure a kid can do it! I know there are people who will make kid’s drawings into things, including softies. That’s a fantastic idea I think! I think I’d enjoy teaching kids how to make patterns from their drawings. I’ve loved making patterns since I was young too, though I enjoy following someone else’s from time to time – it rests the brain a little bit!

monster_bunny_and_chicks

In 2019 I made the above softies for a niece and nephews. They were both modified from other designs I saw online. The chickens have a little pocket for hiding things under the wing, that’s one of the things I added because I love pockets so much. The monster bunny has a stomach pocket too though I ran out of time to embroider a stomach and intestines  on it. My original vision of the monster rabbit also had some other ideas that got put aside as I was running out of time to get it done, but if I make another one I could give them another try. I made a deliberate choice to use crazy mixes of scrap fabric in order to pass on some of my fabric memories to them – even though they don’t know what most of them are, it feels satisfying somehow! I can still enjoy the memories looking at these pictures!

Fabric snake
Found another one! Fabric snake I made when I was somewhere in the age range of 8-12.

Virtual Art Party!

Our kitchen table set up for art fun

I’m trying something new today. I’m hosting a virtual art party on Facebook! It will be at 4:00 pm, Central Standard Time.

How to join:

1. If you are interested in doing some coloring, I have some free coloring pages you can download here:
https://www.facebook.com/carolyn.hasenfratz/media_set?set=a.10222335620243630&type=3

2. Otherwise, get a project you want to work on ready to go at your location.

3. Go to the Facebook event page at 4:00 pm for live video.
https://www.facebook.com/events/1308272826032176/

4. If a chat starts, join in!

5. Upload pictures of what you are making.

Here is a video replay!


Here are some links to things that came up during the video conversation:

Art Journaling With Stencils and Image Transfers – tutorial on how I made the clear collaged bits for my art journals

Book Review: “My Crazy Life Stories from A to Z” by Marilyn Linkul Winka – my review of my Aunt’s book

Fun With Food – my food page, included the roasted vegetables recipe Marilyn talked about

“Back To Our Roots” Art Show – the recent art show that I dedicated to my late friend Mark Reed

Art Journal Selections – my commentary on art journal pages that were in the recent show

Seeing Ourselves – my recent artwork for the Diversity Conference

Photo of Oz and I at Garden of The Gods with late friend from SIUE Gary


Ideas for some art to make perhaps? This is a great idea!

window_scavenger_hunt