Scrap chipboard Ball point pen Pencil Paper cutter Scissors Metal ruler or straightedge for tearing Glue sticks Squeegee or bone folder Old greeting cards Cardstock scraps Assorted decorative papers with floral and garden themes Assorted light colored text-weight papers Paper scraps with text Commerical ATCs (optional) Clean scrap paper for gluing Gesso – white and matte clear Paintbrush Water container Decorative scissors with faux stamp perforation pattern Rubber stamps with greetings and sentiments Floral, botanical and garden theme rubber stamps Rubber stamping ink Metallic gold or bronze paint Optional – stickers, stencils, rub-ons, die cuts and other embellishments from your stash
I was looking through some old greeting cards to recycle recently, and made an observation. Delightful sights from nature are used for almost any kind of greeting card. Condolence, birthday, get well, Valentine, Easter, Mother’s Day, and many more. There are biological reasons for humans being cheered by images of nature. Whether or not we have studied the science behind how that works, it’s something we all instinctively seem to know. So here for you is the first of two parts of a tutorial on making Artist Trading Cards, or ATCs, from recycled greeting cards and nature-based imagery.
Instructions
Make yourself two templates from scrap chipboard. One 4 x 3 inches, another 3.5 x 2.5 inches. These are some standard sizes that commercial ATCs come in.
Tracing onto parts of old greeting cards to make ATCs.
Use your templates to find spots on the cards that you want to use. Trace around them with ball point pen. Then cut them out. If the cards are on matte finish paper, and not slick, you could also do your tracing with pencil.
Commercial ATC cards by Tim Holtz and P13.
Sometimes when you buy a pad of decorative paper there is a sheet or two of cardstock imagery you can cut out. ATC sized rectangles are frequently included. Leftover cards from pocket scrapbooking kits can also make good bases for ATCs. When working on ATCs you’ll probably want to do several at a time, so go ahead and mix commercial and homemade ATC base cards if you want. Seeing all the imagery together could inspire you. That’s one reason I enjoy working with paper scraps and leftovers so much – the mixture encourages extra creativity.
Cover the parts of the card that you don’t want showing with decorative papers. I used mainly papers with a gardening and floral theme. Decorative papers with text and text torn from old books and magazines also work really well with this type of collage.
Covering with torn paper the parts I don’t want showing
Cover the cards with solid pieces of paper, torn strips or free-form torn pieces.
If the backs of the cards are blank, you might want to cover the whole surface. Most of cards in this photo are covered with sections of greeting card envelopes with floral designs in the corner. That leaves a lot of room on the card for adding design elements.
Accent the cards with some brushed white gesso. If the gesso is too opaque, you can mix in some clear matte finish gesso.
ATC cards from paper stacks by American Crafts (left) and Tim Holtz (right).
Part 2 – Prepare Some Embellishments
Cut flowers, butterflies, birds and other garden theme items from old cards and decorative papers.
Butterflies and flowers are good for hiding an awkward joining of torn papers.
With a decorative scissors that simulates stamp perforations, it’s easy to make small stamp-like embellishments. Trim real stamps from envelopes, cut out small square images, or stamp small square designs.
Stamp out some sentiments on strips of paper torn with a metal ruler. I’ve painted some of the papers with white gesso for texture. I stamped assorted sentiments in black.
Part 3 – Embellishing the Cards
Tear out some of the stamped words and glue them to the cards.
Add postal images and cut out images of flowers, birds and butterflies.
Enhance with various rubber stamps until the cards look finished to you.
Rubber stamped paper frame around a collage on an art journal page.I made the collage based on an activity prompt by Somerset Studio Magazine. The stencils for the collage are by The Crafter’s Worshop and Tim Holtz. The rubber stamps in black making up the frame are of my own design. The background paper is by p13.
I made this rubber stamped paper frame for an art journal page. You can make one like it for that purpose or other projects such as scrapbooks, greeting cards, photo displays and more.
When I placed my collage on this piece of decorative paper for my art journal, I thought it needed a little more so I decided to make a frame for it. I used tracing paper to draw out the size and shape I wanted. Then I transferred my drawing to scrap card stock and cut a template to use for tracing.
I traced around and cut out four frame pieces.
I wanted black and near-white rubber stamped images to glue to the frames, so I got a bunch of stamps out that are of my own design and stamped them in black stamping ink on cream color card stock. Some of these stamp designs are available in my Etsy shop, and some only exist as hand carved stamps.
Tearing the stamped cardstock into strips for making smaller mosaic pieces
I tore the stamped images into small pieces, and glued them to the frames.
After trimming the frames were done and ready to mount in my art journal.
Here is a tiny treat basket I made for Easter. You can adjust the colors and themes to suit any occasion you want.
Here is an easy basket to make out of paper for handing out small treats or using as party favors. Each basket side is about 1 3/4″ square. I made these samples for Easter. The colors I used could also work for other spring occasions such as Mother’s Day, showers or weddings. Change the colors and design motifs for any occasion of your choice throughout the year.
Tiny Envelope Treat Basket TemplateGluing parts cut from template printout to leftover file folder cardstock to make templates for tracing.
Loosely cut out the basket, handle, and one of the squares out of the printout. Leave a little paper outside the outline when you cut so that you can trim it closer after gluing. Glue the pieces down on the scrap cardstock with a glue stick, burnishing it well with a bone folder or squeegee to get a good tight seal on the glue. Cut out the pieces.
Fold in the flaps and seams to get a crease the fold back out before you use the basket template. Seeing where the folds are will help you make little pencil marks on the back of the tracing in case you need some to indicate where the folds will go.
Next trace around the shapes you just cut out onto some cardstock with pencil. Only one side is going to show when finished, so if your cardstock is double sided make sure your pencil lines are not on the side you want to show.
Trace squares, the basket, and the handle. Each basket uses two squares as shown, but I made four out of each piece of card stock I was using to have extras for making cards and other things later. Another reason it’s good to have extra squares is that if you use decorative cardstock that doesn’t have the same pattern all over, it’s easier to find combinations that you like with a variety to choose from.
Tracing around basket, handle and square shapes on the back of decorative thin cardstock.
I recommend making several baskets at a time – that’s the easiest way to experiment with colors and patterns to get the look you want. You can make them all match each other, or make them all different like I did.
Cut out the basket piece and handle with a plain scissors, and the squares with a decorative scissors. Punch out a bunch of shapes of your choice.
Cut out a bunch of squares with a decorative paper edging scissors and punch out a lot of hearts so you have a lot of choices to work with.
Take a basket cutout, and fold the flaps and basket sides in and out again to make creases. It’s best to fold toward the outside of the basket first before folding inward. The reason for this is that some colored papers have a white core which can show through if there is tearing along the fold. This shows far less if you fold toward the outside first.
Having creases at this stage makes centering the squares and the punched out shapes in the middle of each side of the basket much easier. Glue a square onto two sides of the basket, and a punched shape on the other two. Then glue a punch shape over each square. Place clean scrap paper over all and burnish well.
Here are some of the resulting color and texture combinations.
One layer of card stock is a bit flimsy for this project in my opinion. To make the basket and handle sturdier, I picked a complementary color of solid cardstock and glued it to the reverse side of the basket and handle pieces to make double thickness laminated cardstock. Then I trimmed around the baskets and handles with a scissors.
Now you can assemble the baskets. Place double sided tape on the flaps and fold in and press the basket together like a little box.
Reinforce each basket corner with design tape, also known as washi tape. Florals and butterflies worked really well with my spring theme.
Put adhesive dots or double sided tape on the top side of each end of the handle, then bend and position it in place. Press with your fingers where the adhesive dots are to firmly attach the handle to the insides. If you think the handle needs a bit more support, a piece of design tape over the join on the inside looks nice and makes the handle attachment stronger.
Here are more examples of Tiny Treat Baskets I made for Easter using different color combinations. I used paper scraps from making them to make little tags which I tied on with bakers twine and embroidery thread.
You’re done! Now you can fill the basket and tie on a gift tag if you want to.
The 2022-23 Holiday season for many people is probably going to be the closest they’ve had for awhile to normal patterns of celebrating. My Dad and I have made some attempts to join in this year, but to be realistic most of our energy has been absorbed by the effort to get and stay healthy. My Dad has been having some medical issues since mid-October and I’ve been staying with him frequently at his house and visiting him him a lot in the hospital. Except for the past week – I just took a week off because I seem to have been hit by a flu-like illness (not COVID, I took the test!). I’m on the mend now. Dad has been taken care of during this time at a rehab hospital and will be coming home later this week if all goes as planned.
When he’s discharged, I’ll be providing some care he’ll need for about three weeks. I’m not sure how much either of us is going to be able to attend holiday activities in person. We will probably have to sit a lot of it out. But we will try to keep in touch online!
The annual project #12daysoftomsbeard is one that my husband Tom and I have been doing every year at Christmas time. It’s a way of combining crafts, installation art, photography, mail art, digital art and conceptual art into a holiday celebration for us and our friends and family and anyone else who wants to join in. From December 25 through January 6th he poses for me with different items in his beard and I apply wacky filter effects then upload the results to Instagram. We invite people to send in pieces to use in the beard. My Dad in particular really enjoys this activity and he wanted to work on some beard parts while he was in the hospital. I’ll show you how we combined stenciling and coloring to make a bunch of pieces to use in Tom’s beard during the 2022-23 Christmas season. I’m going to try to make an extra big deal out of it this year for my Dad and myself because we are going to miss out on most other holiday activities this year.
If you want more background information on #12daysoftomsbeard before reading on, here are a couple of my earlier blog articles about it.
Tools and Supplies Beard printouts – scroll to bottom of the page for links to 6 graphic files to download and print Cardstock and chipboard Pencil and eraser Ruler Black permanent markers Black gel pens Colored pencils Colored markers Painter’s tape Stencils and/or cookie cutters Scissors Hole punch Scrap paper for covering work surface Glue stick Squeegee tool or bone folder
Optional for Embellishments Sequins Glue Squeeze paint
Coloring Idea #1 – Stenciling Over Colored Markers
Stenciling over colored markers
Instructions
Scribbling some colored backgrounds is an easy way to make vibrant backgrounds for stencil art. By filling in the negative spaces with black marker, you can create an attractive faux stained glass effect.
Step 1 – Color in the background with markers in random patches to make something similar to camouflage patterns
Step 2 – Tape a stencil over part of the work area and outline in black gel pen, black fine tip marker or black fine tip pen.
Step 3 – Repeat with different stencils until the whole design area is filled with outlines.
Step 4 – Color the negative spaces in with black marker.
Step 5 – With a glue stick, paste paper pieces to chipboard or cardstock and cut out.
Step 6 – If needed, touch up the edges with black marker to make a neat edge.
Stay tuned for PART 2: Rainbow Effect With Gel Pens and Colored Pencils.
WHAT: If you have ordered something from my Etsy store recently, or if you get a Christmas card from me, you will find inside one or both of the following invitations for #12daysoftomsbeard.
Invitations with tags to decorate. Sometimes I include a little packet of paper ephemera to help people get ideas or inspiration, if they need it. If you want an invitation and did not get one in the mail, you can download one at this link – #12daysoftomsbeard tag invite.
These tags are intended for drawing on or decorating, then sending back to me, so that I can hang them on Tom’s beard each day from December 25 to January 6. During that time I will take a crazy picture of the results to put on social media for people to find when they search for the hashtag #12daysoftomsbeard. Last year Tom and I experimented with different lighting effects, backgrounds and filters to come up with something unusual each day. Last year I tried to group the beard art items, background and filters by color because bright colors usually go far toward cheering and inspiring me.
Here are some examples of tags I decorated last year, a couple that people sent in to me, and a few images that resulted.
WHY: We mostly like to do this because it’s a lot of fun, and it makes us laugh! You should have seen my MIL’s reaction when she saw the orange picture of Tom! “What have you done to my son!!!” We could do this without any participation from others, but we appreciate it whenever anyone wants to join in. It’s an extra creative challenge to use something someone else sent in, and it’s a way to connect with people who are sometimes separated by distance or who I don’t even know in “real life”.
Why do people paint rocks and leave them for others to find? Why do Jeep owners put rubber ducks on random other Jeeps? Why did I put a banana peel on my head earlier this year and have my picture taken with it on? Why did people in Toronto make a memorial display for a dead raccoon and share it on social media? Group activities and performance art projects are a satisfying activity for some reason, for quite a few people. I will probably write more later about the psychological reasons why that is the case.
Earlier this year I started a SWOT analysis of #12daysoftomsbeard to try to use some of what I learned in marketing class to try to increase participation this year. I didn’t finish the analysis yet, but I will keep adding onto it in the future as I finish sections. Here it is if you want to read what I have written so far – SWOT Analysis of #12daysoftomsbeard.
HOW – One idea I want to try for increasing participation is to provide some more specific instructions. The wording on the invitations reads: “To play, color, glue, punch, stamp or otherwise decorate this tag.” For some people, that will be enough guidance, others might feel comfortable with something more specific.
I am going to suggest techniques to try, and post examples here on this page. Watch this space as I add them! Since I like to use mixed media a lot, it will be a challenge for me to use just one technique at a time, so maybe I’ll try that. Enjoy!
Drawing
Coloring
Stenciling
Stickers
Hole punches
Design tape – also known as Washi tape or Paper tape
Collage
Rubber Stamping
Image Transfers
?????????? – What other techniques could be used?
Here are four examples of beard invitations I made for the 2022-23 season. They are meant to look a bit like chunks of hair that when assembled and applied to Tom’s face, will resemble a beard.I added a QR code to this web page so people could quickly find out what it is and what to do with it.Here are links to all six variations.
To participate, print out one or more of these sheets. Color or decorate the beard pieces with the designs and materials of your choice. Mail the pieces to Tom and I. Then check the hashtag #12daysoftomsbeard on Instagram between December 25 and January 6 each year to see what happens!
For more inspiration
Here is a link to a slideshow of images from the web page of IUOMA – The International Union of Mail Artists. I’ve been uploading the beard pictures to this gallery as I go. Intermixed are images that other people are uploading of conceptual art that they are both sending and receiving. This slide show changes daily as new images get added and older ones drop off. It might give you some ideas! Sometimes I put this slideshow on the screen while I’m working for extra inspiration!
I know several people who could use some encouragement right about now, including myself. I decided this week to get out my paper craft supplies to have a bit of creative fun and make supportive cards to use and more to give to people I know.
First I’ll explain what both self-care cards and Project Life cards are. Self care could be considered the practice of maintaining your physical and mental health in order to prevent burnout and breakdowns. While looking for some resources for my Self Care Pinterest board that I use for reference, I found some specifically aimed at caregivers of different kinds. Even if one chooses from their own free will to be a caregiver, it’s still a tough job. As these resources I found mention, one should not feel guilty for practicing self care even if you are naturally inclined to be giving – a burned out or broken down person is not in a good position to help others. We are able to be of much better service when we are strong. We are often socially engineered by individuals and institutions to sacrifice our own agency to serve interests not our own or of our own choice. I think it’s a beautiful thing to voluntarily share but not to be manipulated or coerced into it. The latter is just being a victim of people who choose to live a parasitic lifestyle.
So what are self-care cards and where do they fit in? There are many types of cards with different information that people have used over the years as reminders or teaching tools. Small cards are portable and fit in a wallet, a planner, a journal, a pocket or wherever so that you can access reminders on the go or wherever it’s convenient. When learning new life habits we might need a touchstone of sorts to keep us on track. Self care cards are just cards with self-care content. They can be purchased, downloaded for printing, or handmade. I often like to use a combination of desktop printing and paper crafting methods to make or decorate self care cards for myself.
What are Project Life cards? Project Life is a commercial product developed by designer Becky Higgins intended to make scrapbooking and related memory crafts easier and less time consuming, and to relate the activity to living well and positive personal goals. Pocket scrapbooking is a generic term for using clear pocket album pages to organize cards and various paper items. Like a lot of people, I picked up the modern form of the hobby of scrapbooking in the 1990s. When I first heard of pocket scrapbooking I was intrigued and purchased some cards to use in conjunction with with my “conventional” scrapbook pages and also in other paper crafts.
Several years ago I purchased the Project Life Cinnamon Core Kit and the Road Trip Theme Pack. These sets featured lots of colors I used a lot, and graphic themes that were complementary to a number of products I already owned.
I’ve used a lot of the cards in scrapbooks and other paper projects over the years but still have a good quantity left. Because some of the Project Life cards feature positive messages and others contain grids or lines to help with journaling or record keeping of various kinds, they are well-suited to use as a base to make self care cards. If you want to make these of course the bases of your cards don’t have to be specifically from Project Life – a variety of products could be used.
One activity that I learned a few years back from a depression support group web page is the acronym G.R.A.P.E.S. It stands for:
Being Gentle with yourself
Relaxation
Achievement
Pleasure
Exercise
Social
The idea behind using this acronym is to try to do one activity on the list from each category every day. From my own experience and from what others have told me who have tried it, even if it isn’t possible to do each category each and every day, striving to do it and tracking the activities each day to make sure one is continually improving does result in better mood and health. It helps you “social engineer” yourself into having a better life. This is anecdotal information of course, but if you delve into scientific research on mental health you will find out why it’s effective. In this project, I’ll show how I made self care cards track the use of activities from the G.R.A.P.E.S. categories. I put more “decoration” on these cards than is strictly needed but it’s fun to use up paper scraps while making cards that fit my own personality. And paper crafting itself is a great way to get the Pleasure “task” checked off for the day!
Tools and Materials
Project Life or other cards Scrap papers in harmonious colors Scissors Paper cutter Glue sticks Thin markers in black and colors harmonious with chosen color scheme Small letter stencils Small letter stickers Assorted encouraging stickers, die cuts, paper scraps featuring helpful sayings or sentiments, or other appropriate embellishments Rubber stamping ink – black and harmonious colors Rubber stamps Hole punch Cord or string to loop through hole
First I added paper scraps to the existing Project Life cards I had whenever I wanted to make the existing designs more to my taste. Mostly this consisted of adding paper scrap strips to the borders on some of the cards, leaving the grids or lines in view. Some of the cards were fine the way they were.
Next I assembled a variety of letter stickers from my collection that spelled G.R.A.P.E.S. For more variety, I drew some letters with marker through alphabet stencils and cut those pieces of paper out. I added the letters G.R.A.P.E.S. along the side on on side of the card. Since these cards came with designs on both sides, I used the other sides for spaces to take notes, or for making a mini encouraging collage with stickers and paper ephemera.
When necessary to make a grid to keep track of activities, I added vertical lines with thin markers.
I punched a hole at the top and added some string with a lark’s head knot so that I can use these cards as bookmarks also.
I thought some of the cards needed just a little bit more added to make them looked finished, so I stamped here and there with assorted rubber stamps and added a few more stickers.
As I complete daily activities that fit one of the G.R.A.P.E.S. categories, I’ll put a checkmark in the proper spot on the grid.
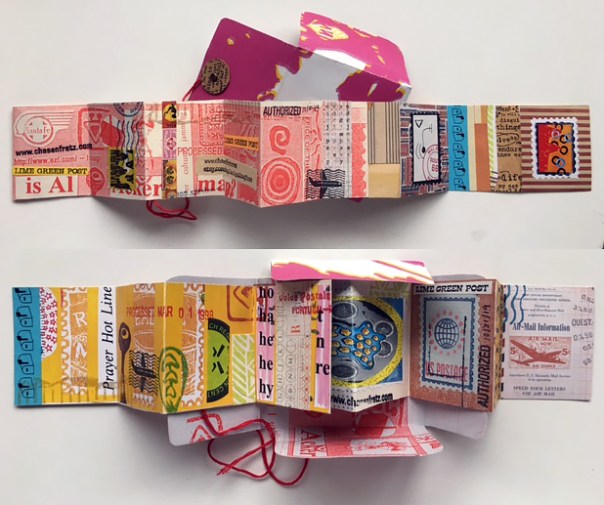
Two finished Christmas faux postage sheets. I’m going to make copies of these and cut them up to use on mail, tags, packages, and more.
Tom and I are spending part of this weekend planning our Christmas crafts, card list, and gift list. 2020 will be our third Christmas as a married couple! It’s always been part of my tradition to participate in as many Christmas crafts as possible. Since we are Roman Catholic, Christmas lasts a long time – over a month. Both for cultural and religious reasons, the Christmas season for us is from the day after Thanksgiving to January 6. Activities all through this time period are how I celebrate Christmas, I don’t just celebrate it for one day. Integrating crafts and creative pursuits as much as possible is one way I show gratitude to God for the gift of being able to share creativity with other people, whether through a handmade gift, a piece of mail or a social media post. There is probably going to be more inspirational holiday sharing online this year than ever before and I’m going to try to do my part!
I’m noticing that Tom and I are developing our own set of Christmas traditions, incorporating some things transferred or revived from our families of origin, combined with activities that are unique to us as a couple. In no particular order we participate in:
1. St. Nicholas Day – we used to celebrate this when I was young, and since it is very special to me we have brought it back.
4. Reverse Advent calendar food pantry donation – we did this last year and found it worthwhile so are going to do it again this year. It is a great way to remember to be grateful, keeping in mind what other people might really need instead of just what we want.
Today I’m going to focus on this year’s Christmas Faux Postage. It’s going to play a part in this year’s card design and possibly other craft projects too so I’m working on the faux postage first. As I did last year, I printed out two each of templates for making faux postage that I made available online, and Tom and I each started building compositions on two sheets. Here are two articles I wrote last year showing how I made designs with the two templates, including links for downloading the templates.
This year to start off our stamp sheets, Tom and I sat down with the printed templates, stickers, red, green and white image transfers that I made last year, collage papers and various markers and pens.
Developing four Christmas themed stamp sheets
I’m in the process of finishing up those stamp sheets by treating them in a similar manner as the ones in the two tutorials linked to above, Low-Tech Faux Postage parts 1 and 2. I have stamped out some tiny words such as “US Postage” on strips of scrap paper and am gluing them down where there is room on the stamps designs. I’m making borders with mixed media. I’ll add some postmark stamps to the sheets and use stamps and perhaps stencils to add a little fine texture here and there where I think it’s needed. When the stamp sheets are done, I’ll get color copies made and cut up the copies into individual stamps to use on all kinds of Christmas paper crafts.
Photo by Carien Van Hest. Both sides of the mini accordion book I sent her with its two-sided envelope.
Back in 2019, I made a couple of square mini accordion books, 2″ x 2″ in size when folded up. While sending out my 2020 Christmas cards, I finally made envelopes for holding four of them and I sent them out to a few people in my Mail Art network. Here is an article I wrote about how I made that batch of little books – Made From Scraps: Mini Accordion Books.
In the spring of 2020, shortly after the pandemic started, my husband Tom and I started hosting a #virtualartparty online for several weeks in a row to help ourselves and people we know cope with loneliness and anxiety. During the second session, I demonstrated how to make these little accordion books since they can be made from scraps and supplies many people already have around the house. At the end of this article is the archived video of that accordion book session. I started two books that afternoon, which I finally finished recently.
The image below shows the first book, titled “The Wonder of Life”. The top two images are of each side semi-folded. Below that are some close-ups of different sections of the book. To make these mixed media collage compositions, I combined found paper scraps, rubber stamping, design tape, stencils, marker drawing, and image transfers made from clear packing tape. Here is an article I wrote about how to make the image transfers – Art Journaling With Stencils and Image Transfers.
Mini book by Carolyn Hasenfratz Winkelmann called “The Wonder of Life”.
The next image below shows several examples of image transfers I was making next to sections of the stretched out accordion books that I was trying to coordinate with. I knew I would not know exactly how the semi-translucent transfers would look when they were laid over the underlying paper collage, but to make sure they were at least somewhat harmonious I looked for images for my transfers that reflected the colors and shapes of images I used in my first layer.
Coordinating transfer images to lay over collaged images.
I made a template for an envelope to fit the books or any thin 2″ x 2″ object for people to download and use to make an envelope for their book if they so wished.
Mini Book Envelope Template
I used the above template to trace two envelopes onto cardstock. I cut the envelopes out and made folds where the dotted lines are in the template so that the envelopes would be thick enough for the little books. With a circle punch I cut little circles to use for making a string closure. I made extras knowing I was going to put transfers on these circles – I wanted to be able to choose from several to get ones that looked good with the finished envelopes.
My next step was to paint the fronts and backs of each envelope with clear acrylic medium, letting the medium dry before I flipped them over to coat the other side. This step was for three purposes – to increase durability, to reduce wrinkling when I later applied layers of transfers and paper, and to make the paper more receptive to the slick tape transfers. When all was dry, I applied transfers to the outsides of the envelopes using clear medium as the glue and burnished them well to remove any air bubbles. After they were dry I trimmed the transfers to the edges of the envelopes.
Applying tape transfers to cardstock envelope. Envelopes after trimming.
For the insides of the envelopes, I used the acrylic medium to laminate a pieces of paper with a matte finish to the insides of the envelopes. I wanted a matte finish for the insides instead of a shiny finish so that the envelopes would not stick to the books when stored.
The final steps in finishing the book covers were to attach the small cutout discs I made earlier with small brads, and wind embroidery thread around the discs to make a string closure.
I designed this project around some collaged stars I had made awhile back while working on my previous tutorial, Making Greeting Cards From Scrap Papers. If you don’t want to make your stars in that style, you can use any paper or cardstock star of your choice.
This card design uses quite a few tools and materials, so if you are going to get them all out you might as well make several. Having extra cards on hand is a real time saver sometimes!
Supplies:
Cardstock
Assorted small paper scraps
Decorative paper large enough to make envelopes
Tracing paper
Tape, single and double-sided
Pencil
Scrap chipboard
Glue stick
Black rubber stamping ink
Clean scrap paper
Envelope template – free download here for a template that fits a 5.5 inch x 4.25 inch card – Envelope template for Rectangular Card
Tools:
Greeting Card With Star and Arrow Template (free download here)
Paper cutter
Metal ruler
Self-healing cutting mat
Scissors
Rubber stamps with sentiments
Colored pencils
Prismacolor art stix or similar product (like Conte crayons in more than just basic colors)
Sharpie Pen
Sharpie Twin Tip Marker Fine/Ultra Fine
Squeegee or bone folder tool
Rubber stamp Bubble Border Small or other border stamp
Rubber stamp Rounded Squares and Rectangles Border Large or other border stamp
Stencil for the “awesome” arrow – Mini Word Arrows 6×6 Stencil – if you don’t have that stencil, you can use a stamp, stencil or paper of your choice for the small arrow portion of the card.
Tape tracing paper over the printed out template, and make tracings in pencil over the star portion, the arrows and the shapes on either side of the star.
Write “front” on the tracings before you remove them from the template.
You’ll use these tracings to transfer your pencil markings onto the the backs of scraps of chipboard to make templates for tracing and masking.
To transfer, place your scrap chipboard pieces face down and flip your tracing paper over so that the back is facing up. Tape in place and go over your pencil lines. When you lift the tracing paper, you’ll have lines you can follow as you cut.
Out of one piece of chipboard, use a utility knife and a metal ruler to cut the two side shapes and the star out.
Make yourself templates for the large and small arrows as well.
Put the front of the card on your work surface and tape the stencil/mask over it. With a thin, light pencil outline the star and two side shapes. These light pencil lines will help you line things up in the later steps. Place the large arrow template where you would like it and trace around it too.
Stamp in black through the mask onto the front of the card, alternating the border stamps you are using.
Lift the mask to see that portions of the front of the card are partially filling the cut out shapes. This is a technique you can use with stencils or masks you cut yourself or with purchased stencils.
At this point, you can choose to erase your pencil guide lines, or disguise them by drawing over them with a marker or color pencil. I drew over mine with harmonious colored pencil colors.
Choose an art stick color and go over your outlines heavily, and the insides of your shapes lightly.
Choose a 1″ x 5.5″ piece of scrap decorative paper in a harmonious color. Fold it lengthwise, apply glue to the back and use it to cover the fore edge of the card.
Trace the large arrow onto a piece of decorative paper and cut it out. Glue it in place on the front of the card.
Take a bright, lighter piece of paper and tape it to your work surface. Tape your stencil over the paper so that the paper shows through the word “awesome”. Outline the “awesome” arrow and lettering with a black Sharpie pen, then lift the stencil and finish filling in the arrow with the fine tip of a Sharpie double-sided black marker.
Glue the star and small arrow to the front of the card. Accent the lower and rightmost edges of the star and small arrow with the thick tip of the double-tipped Sharpie marker.
Make an envelope for your card by tracing Envelope template for Rectangular Card onto the back of a piece of decorative paper, then folding it and taping it together. Your’e done!
Do you like adult coloring but don’t feel completely satisfied coloring someone else’s designs? Here is how you can use scrap papers and cardstock along with stencils to make custom homemade coloring books that reflect your own creative point of view.
What you will need:
Pencil
Scissors
Glue stick
Paper cutter
White or off-white card stock
Hole puncher
Black ball-point pen
Black Twin Tip Sharpie Permanent Marker – Fine/Ultra Fine
Tape
Bone folder or burnishing tool
Clean scrap paper
Metal ruler
Metal binding rings
Assorted found papers that relate to coloring (pictures from magazines, old books, catalogs, etc.)
Assorted black and white images on paper (scrapbooking papers, found images) Assorted stencils (hand-cut from your own designs, commercial crafting stencils, or a combination)
Instructions:
1. Cut out two pieces of cardstock 8 1/2 x 6 inches for covers. Select some found images that have to do with coloring and make collages on the front and back covers by gluing these images down with a glue stick. Put a clean piece of scrap paper over your collage and rub well with a bone folder or burnisher to make sure the papers are glued down flat.
2. Cut a bunch of 8 x 5 1/2 inch pieces out of white or off-white card stock or paper. I’ll walk you through using a combination of found papers and stencils to create black and white designs to color in later on these pages. It’s intimidating to have a bunch of blank pieces of paper staring you in the face, so to begin tear some papers with black and white designs or printing on them into strips using a metal ruler a guide. Glue some of these pieces on several of your blank pages in random places and directions.
3. Further build up your designs by using a variety of stencils to draw shapes randomly on your pages. Add black and white collaged images or textures to further enhance the pages.
Coloring pages are very appealing when you use different line weights to outline areas to color. I suggest you proceed by marking some areas with a heavier line first then progressively moving down in line weight as you add more detail.
A. Outline some areas from bold stencil designs using the “Fine” tip on the Sharpie marker.
B. Go back through your pages again and add more stencil designs outlined with the “Ultra Fine” tip on the Sharpie marker.
C. Go through the pages a third time and use yet more detailed stencils to draw on the pages with the black ball-point pen.
As you build your compositions, I suggest laying pairs of pages down on your work surface that will be opposite each other in your finished book. See if you get any ideas from how they look together. Here are some examples of pairs I made to complement each other.
4. If any of your pages are made of thin enough paper to let some of the marker lines bleed through, don’t get discouraged. Redraw the design in reverse on the other side of the paper to disguise the bleed-through and create some accidental compositions that could be very appealing and lots of fun to color.
5. Punch a top and bottom hole in the cover pieces and each page and connect with binding rings to make into a book. In order to get the holes to line up correctly, you can trace the holes in the first page you punch onto subsequent pages, or make yourself a template out of scrap chipboard.
6. Have fun coloring your pages. I like to use a combination of colored ball point pens, gel pens, markers and colored pencils. If you experiment with a lot of different media and practice you will develop your own style of mark making. If you would like some inspiration for coloring styles and techniques, I have examples on an Art Journaling Pinterest board that should help you out. The most important things to remember while coloring are to have fun and don’t let expectations of how your work is supposed to look be a damper on your creativity and expression.
My husband Tom and I each colored one of these pages.