Faux postage is a really fun mixed media project to make because it’s relatively non-threatening to create tiny works of art in a format that everyone is familiar with. There are lots of craft products you can buy that make it easier to make artwork that looks like postage stamps. A long time ago I designed some rubber stamps for this purpose and some of them are currently for sale in my Etsy shop. You can make this project with any other small stamps that you own also and a selection of paper crafting supplies. Enjoy!
1. Download and print out the two-page PDF file Low Tech Faux Postage. You’ll use the first page for Part 1.
2. Cut out some paper rectangles that are 1 3/4 inches tall and 1 3/8 inches wide from dark paper. You will need at least 16 rectangles.
Cutting rectangles from paper scraps to glue onto faux postage template.
3. Trim the edges with a paper edging scissors and arrange on your Low Tech Faux Postage sheet Page 1. You can think of your sheet as one composition made up of 16 tiny compositions if that helps you to get ideas. Glue down your trimmed paper rectangles.
4. Use a 1″ square paper punch and start by punching out one square for each rectangle from a selection of random scrap papers. Arrange until you are satisfied. If you have similar sized paper punches in other shapes such as circles, feel free to try them out. As you look through your scrap papers, you might get inspired to cut out other shapes. If you are moved to do so, go ahead and cut out whatever you like and glue down on your sheet without worrying about whether or not you’re “inside the lines”.
Paper collage on the template sheet. Mine is on the left, my husband Tom’s is on the right.
5. Take some tiny rubber stamps with words, phrases, numbers or symbols that have to do with philatelic stuff like stamps or cancellations. Stamp them in permanent black ink on light colored pieces of scrap paper. When the ink is dry enough to handle, cut or tear out what you have stamped.
6. Glue the torn or cut pieces to the collage work you’ve already done to help make each rectangle suggest a postal stamp design.
Stamped paper bits glued to collage.
7. Continue to add embellishments to your stamps until you think they look finished. Here are some suggestions for what you can add:
More cut collage papers, found or commercial
Stickers
Drawing – paint and gel markers are interesting choices to experiment with because you can write with them on slick surfaces and sometimes dark backgrounds as well
Stenciling Image transfers
Design tape
Rubber stamping
8. When your stamp sheet is done, you can frame the whole thing to display it, cut apart your stamps to make tiny artworks, make color copies then cut apart the color copies, or put the whole thing in an art journal. Your imagination is the only limit and the most important thing is to have fun!
Many years ago, as one of my Mail Art projects, I used to fold two-inch wide pieces of paper into little accordion books and decorate them with rubber stamps and pieces of paper that I cut out from incoming Mail Art and decorated envelopes. I carved a rubber stamp with a little graphic of a Mail Box and the words “Bits of Mail” to stamp on the little book covers. Before sending them out, I dated and numbered them on the back. I saved one example for my archives and made a few color copies to use later as collage inspirations. While I was getting the color copies made, it came up in conversation with the copy center worker that one of the black and white machines had red toner in it. I made a lot of copies with the red toner because I knew I’d find uses for the copies later!
One of my original mini accordion books from 1998 with some color and red ink copies I made at the time for future collage work.
Some of my old collage papers along with my Mail Archives had been in storage unseen for 20 years or more. I’ve been getting some of them out lately as I move stuff. With fresh eyes, I’m getting some new ideas and inspiration for improving old ideas. I decided to take these old copies and make new versions of the mini accordion books.
First I cut up the copies that weren’t already in strips into two inch wide pieces, the same size as the originals. Then I folded them and glued one red ink copy to one color copy back to back to make longer books.
Old copies with color ink and red ink cut into two-inch strips, folded and glued to make mini accordion books.
I had a large paper crafting stash by 1998 already because I started making collages in 1985 in my first college design class and I’ve been collecting interesting papers for collages ever since. In the intervening years, there are a lot more paper crafting supplies available and some of them are a lot more to my taste than what was available in the late 1990s. Back in the day I would have said I was a “weird” stamper not a “cute” stamper. I also enjoy sophisticated antique imagery and have a lot of papers from two of my favorite brands, Tim Holtz and 7 Gypsies, in my stash. I decided that the Tim Holtz idea-ology Correspondence paper pad was a good fit for this project and I glued some of the postal themed textures onto a selection of the blank pages of my books. The dominant colors in this series are red white and blue which looks good with the red toner ink on some of my papers and the postal motifs fit the “Bits of Mail” theme.
Next I went through I box of paper scraps that I keep for teaching a card class that I run from time to time on how to make greeting cards from little scraps, rubber stamps and stencils. I took out a selection of papers that I thought would make good backgrounds and glued them in a random fashion to every other page, leaving some blank.
Mini accordion books ready for adding content.
There is an old trick that I learned in drawing class long ago to help get unstuck if you are facing a blank piece of paper with no ideas – draw a quick frame around your drawing area before you start. This helps because it’s less daunting to start drawing on a paper that you’ve made some marks on than a blank surface. I get the same creative boost from using scrap papers for perhaps a similar reason – there is already some content there, however sparse and random, and that is often all I need to get me going in a creative direction.
The little accordion books I’ve made are pictured above ready to add content. What kind of content would that be? There are lots of things I could do with these little books. I could write, draw, stamp or paste in words and/or images to make a finished artistic statement. I could use them as a storage and display folio for tiny works of art such as postage stamps, faux postage stamps or tiny photos and images. I could send them off into the Mail Art network as an “add and pass on” project. What would you make?
For additional inspiration, here are some samples of tiny books made by other people that I’ve received through the mail over the years. People of any age and ability level can make tiny books. Why not try one?
A black and white collage faux postage stamp sheet I made. I used to get these printed on gummed paper and send them to other mail artists. Circa 1997.
I’ve been out of the Mail Art and ‘Zine scenes for over 20 years now, and to my surprise for some reason I’m getting nostalgic about it and thinking about getting back into it a little bit. I’ve never stopped making faux postage designs, rubber stamped art and Dada-influenced collages, but I stopped networking except through my web site because I got spooked by some of the extreme networkers I was occasionally in contact with. I figured I no longer had the stomach to participate in the “underground”. I mainly was networking for art and creativity and I’m still inspired creatively by what I did back then. I was not in it for anarchy, political change or social change except for some social commentary that I occasionally included.
I think part of the reason I feel like possibly participating again is that when I got spooked, I was in the middle of a couple of Mail Art group projects that I didn’t finish and I never sent out the documentation. I’ve felt guilty about this for a long time. One was called the “Turn Off Your Television Project” and another was called the “Fish Tapestry Project”. After writing the research paper I just published yesterday, I think I might want to finish that documentation and fulfill the obligation I took on myself 20 years ago. I probably won’t be able to get in touch with all the people who participated but I can try.
The Turn Off Your Television Project on display in my 1998 art show “Areas Affected by Shapes”.A graphic I made to promote the “Turn Off Your Television Project”, circa 1998.
My friend Mark Reed who co-hosted the fish tapestry project with me passed away late last October and it would be a great tribute to him if I could finish that one too someday. I have only this week been able to bring myself to look again at some of his artwork that his family gave to me. I always thought he threw away too much of his old work and I’m glad that I have some of it. I may even finish some of the stuff that is unfinished. We collaborated and shared ideas a lot back in the day. I think he would like that.
Oh how I used to love making animated gif art!
I would be pleased if someone finished my old work after I’m gone. I’d rather have that happen than it be thrown away. I always have a lot of unfinished projects that I take up and put down at various times. I’m sure I’ll be leaving some unfinished ones behind someday. Actually it’s been painful for me to look at a lot of my old work and archives for a long time because so many of the people that I lived that time of my life with are dead. Maybe now I’m finally able to start dealing with the memories. Also I felt like much of my old work was an embarrassing failure. Looking at it now, some of is indeed embarrassing but some of it is not so bad! A former abusive relationship made me feel like I should not do any art because I was no good and didn’t deserve to do it just because it was good for me and made me feel alive. There was a time when I wasn’t sure I was ever going to take it up again.
Here is a faux postage design I made as a computer graphic when I was a beginner at learning Photoshop. 1997.
My Mail Art name was Carolyn Substitute, my ‘zine was called the Lime Green News, and my faux postage was produced under the name “Lime Green Post”. I decided today to do an online search and see if I could find any references to my old Mail Art activities.
If you would like to explore this world I found the following:
stardust Memories Mail-aRt-Links and projects – bless this person for putting a link to my old web site on archive.org! I haven’t seen it in so long. I redesigned it in 1999 and I don’t think I looked at the old one since then because it made me so embarrassed!
Lime Green Evolution World of Art – 1997-1999 – My first web site, how I transitioned from analog networking to digital networking. Thinking back on it, printmaking class in 1987 led to rubber stamping, rubber stamping led to Mail Art, Mail Art led to ‘zines, ‘zines led to taking a class to get better at desktop publishing, which led to published a web site, that led to being a web designer, which led to doing marketing which led to me working on a marketing degree. No wonder I called my first web site Lime Green Evolution. And I didn’t even put in all the other tangents I followed along the way! I used to stay late a lot after my web design job ended at 5 pm to work on my personal web site and wait for the traffic to die down.
One of the things we are studying in my Mass Communications class is how people make media meaningful for themselves. Back in the ‘zine / grunge / Mail Art era we used to do a lot of collages, small press publications and mixed media projects. I’m sure there are still people out there doing these things and with technology we have a lot more options available. Most likely I’ll be exploring this in a future research project.
Edit: here is my new page on the International Union of Mail-Artists web site. I’ll be putting some old and new work there.
I made this collage right at the time I stopped publishing the Lime Green News in paper form. I’m pretty sure I have a draft written on some floppy disc somewhere about how I made this collage and some others using outlines of black paper that I cut out with paper edging scissors to make compositions that look like postage stamps. I was going to publish the tutorial and a copy of the background for people to make their own stamps. I made several stamp sheets using this background as I recall. Such stamps are also known in the art and stamp collecting world as “Cinderella Stamps”, “Postoids” and “Artistamps”.
I never went back to the idea with this pseudo-postal background because I assumed that with computers and desktop publishing becoming more prominent people would not be interested in making faux postage stamps the “analog” way any more. But looking at this collage now that more than 20 years have passed since I made it I actually like it a lot. After going to that Gauguin show that I wrote about in my last blog post I’m reminded of how much I loved studying other cultures and abstracting some elements from them into and combining them with Mid-Century Modern type of abstraction. A lot of the black line work was made by rubber stamps. The Egyptian hieroglyphics stamp is a commercial rubber art stamp, but I carved all the others.
The above collage rearranged and with the colors inverted to use as a Facebook header
For some reason if I scan a collage and invert the colors in Photoshop, the results are often better than the original. I needed a new Facebook header so I rearranged the above collage and did a quick inversion. Fun!
Here is another collage I made using the same background
Do you like adult coloring but don’t feel completely satisfied coloring someone else’s designs? Here is how you can use scrap papers and cardstock along with stencils to make custom homemade coloring books that reflect your own creative point of view.
What you will need:
Pencil
Scissors
Glue stick
Paper cutter
White or off-white card stock
Hole puncher
Black ball-point pen
Black Twin Tip Sharpie Permanent Marker – Fine/Ultra Fine
Tape
Bone folder or burnishing tool
Clean scrap paper
Metal ruler
Metal binding rings
Assorted found papers that relate to coloring (pictures from magazines, old books, catalogs, etc.)
Assorted black and white images on paper (scrapbooking papers, found images) Assorted stencils (hand-cut from your own designs, commercial crafting stencils, or a combination)
Instructions:
1. Cut out two pieces of cardstock 8 1/2 x 6 inches for covers. Select some found images that have to do with coloring and make collages on the front and back covers by gluing these images down with a glue stick. Put a clean piece of scrap paper over your collage and rub well with a bone folder or burnisher to make sure the papers are glued down flat.
2. Cut a bunch of 8 x 5 1/2 inch pieces out of white or off-white card stock or paper. I’ll walk you through using a combination of found papers and stencils to create black and white designs to color in later on these pages. It’s intimidating to have a bunch of blank pieces of paper staring you in the face, so to begin tear some papers with black and white designs or printing on them into strips using a metal ruler a guide. Glue some of these pieces on several of your blank pages in random places and directions.
3. Further build up your designs by using a variety of stencils to draw shapes randomly on your pages. Add black and white collaged images or textures to further enhance the pages.
Coloring pages are very appealing when you use different line weights to outline areas to color. I suggest you proceed by marking some areas with a heavier line first then progressively moving down in line weight as you add more detail.
A. Outline some areas from bold stencil designs using the “Fine” tip on the Sharpie marker.
B. Go back through your pages again and add more stencil designs outlined with the “Ultra Fine” tip on the Sharpie marker.
C. Go through the pages a third time and use yet more detailed stencils to draw on the pages with the black ball-point pen.
As you build your compositions, I suggest laying pairs of pages down on your work surface that will be opposite each other in your finished book. See if you get any ideas from how they look together. Here are some examples of pairs I made to complement each other.
4. If any of your pages are made of thin enough paper to let some of the marker lines bleed through, don’t get discouraged. Redraw the design in reverse on the other side of the paper to disguise the bleed-through and create some accidental compositions that could be very appealing and lots of fun to color.
5. Punch a top and bottom hole in the cover pieces and each page and connect with binding rings to make into a book. In order to get the holes to line up correctly, you can trace the holes in the first page you punch onto subsequent pages, or make yourself a template out of scrap chipboard.
6. Have fun coloring your pages. I like to use a combination of colored ball point pens, gel pens, markers and colored pencils. If you experiment with a lot of different media and practice you will develop your own style of mark making. If you would like some inspiration for coloring styles and techniques, I have examples on an Art Journaling Pinterest board that should help you out. The most important things to remember while coloring are to have fun and don’t let expectations of how your work is supposed to look be a damper on your creativity and expression.
My husband Tom and I each colored one of these pages.
Last fall during the Old Webster Fall Art Walk, I demonstrated making pages for an art journal with paper collage work and stencils at Schnarr’s Hardware. I added in some paint samples to pay tribute to the hardware store atmosphere and remind me to have fun with colors. Later on I added some image transfers I made with clear packing tape. Learn how to make image transfers and add them to your art journal pages on the Schnarr’s blog:
Letter charms made by making a paper collage then adding letter stickers and jewelry parts.
I love to make mixed media charms and beads to use in jewelry making. Recently I participated in a charm swap and made some initial necklaces for friends at JoAnn Fabrics and Crafts where I am a teacher. Learn how to make these charms by reading my tutorial on the Canvas Corp Products blog!
My paper crafting and mixed media supply stash is substantial. Recently when I wanted to make some vintage inspired handmade journals as gifts I was faced with a pretty overwhelming number of options. Sometimes if you have too many supplies you can feel overwhelmed and a little inhibited. To get my creativity revved up I decided to see what I could come up with if I limited myself to three brands only – Canvas Corp Brands, Tim Holtz and DCWV. Those three brands still give you a huge number of options don’t they – not much of a limitation! I narrowed the possibilities a little further by setting out items from this list in my studio:
Ok I cheated a little bit – in the second journal I needed some patterned translucent paper so I slipped in some Vellum Swirls paper by Paper Pizazz.
Yes, that is still a lot of product to choose from, but it’s at least a somewhat more manageable subset of my stash! These slide shows feature 8.5 x 5.5 inch pages in pairs, starting with the front and back covers.
Everyone is Irish on St. Patrick’s Day! Wish good luck and celebrate spring by making St. Patrick’s Day Cards!
Supplies and Materials
Cardstock and a variety of decorative papers in shades of green
Downloadable templates “St. Patrick’s Day Card 1” and “St. Patrick’s Day Card 2”
Scoring tool
Tracing paper
Chipboard (can be scrap – for making templates)
Flower punch
Small circle punch
Paper flower embellishments
Eyelets
Eyelet setter
Metal ruler
Craft knife and blades (X-Acto or something similar)
Cutting mat
Pencil
Eraser
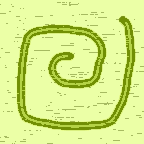
Rubber stamps (St. Patrick’s Day, appropriate greeting, Celtic designs, spirals)
Stamping ink pads and re-inkers in the following colors: dark brown, shades of green
Acrylic stamp mounting blocks
Double-sided tape
Paper cutter
Awl or needle tool
Small hole punch
Scissors
Decorative scissors
Glue stick
Masking tape
Hammer
Decorative brads
Optional – buttons, white craft glue such as Turbo Tacky Glue, needle, thread
The first part of the process for the pair of cards is to stamp out St. Patrick’s Day and Celtic motifs onto small pieces of scrap paper. Use stamping inks in various shades of green and dark brown. Mix in some neutrals if you want. You can make the backgrounds more interesting with the use of background stamps or techniques such as brayering.
Once you have a quantity of stamped pieces finished and the ink is dry, gather them together with some scraps of paper in various shades of green. Make a collage by gluing these scraps down with a glue stick onto a 1/2 sheet of white cardstock. You can create interest by cutting the scraps into smaller pieces by tearing while using a ruler as a straight edge or by cutting apart with decorative scissors. Burnish your collage periodically with a bone folder under a piece of clean scrap paper so the glue has a nice tight seal. Set aside for now and let the glue dry.
Collage made with scrap paper and paper pieces that I stamped with rubber stamps.
2. Cut a 8.5 x 5.5″ size piece of card stock to use as the background of your card. Score it and fold it in half.
2. Trace the shamrock from the template onto the back of dark green decorative paper. Cut out the shamrock with scissors. If you want to make several cards, you can trace the shamrock onto chipboard and cut it out to use multiple times for tracing.
3. Trace the half-leaf shape onto chipboard and cut out. Trace onto four different pieces of decorative paper in different shades of green. Instead of pre-made decorative paper you can use some parts of your collage if you want (if you do this be sure to leave at least a 3 7/8″ x 5 1/8″ sized piece intact to use on card #2). Glue the half petals in place as shown on the card sketch in the PDF file.
4. Cut out a narrow strip (3/4″ wide) of light colored paper and stamp or glue a sentiment onto it. Glue this onto a slightly wider (1″ wide) paper strip. Glue to front of card and trim.
5. Glue the shamrock down in place on the front of the card.
6. Punch out a flower shape with a punch and glue down in center of shamrock.
7. Punch out a small circle and glue in place on the strip near the bottom of the card.
8. Punch two holes for eyelets in the center of where the two flower embellishments will go. You can use a small hole punch or a needle tool or awl to start the hole. If the hole is not large enough to accept the eyelet you can enlarge the hole with paintbrush handle or other handy tool.
9. Push the eyelets through the holes and set with the eyelet setter.
Variation – use buttons as embellishments instead of the paper flowers. Attach by gluing with white craft glue then further secure by sewing.
2. Cut a 8.5 x 5.5″ size piece of card stock to use as the background of your card, score it, and fold it in half.
3. Cut out a 3.75 x 5″ size piece of dark green cardstock.
4. Trace the shamrock from the template onto the back of the dark green cardstock. Cut out the shamrock with a craft knife. If you cut carefully, you can use the cutout to make another card. If you want to make several cards, you can save your first cutout and use it multiple times for tracing.
5. Get your collage out and cut a 3 7/8″ x 5 1/8″ size piece out of it. Position your dark green cutout piece over it and place those on top of your folded cardstock card base. Make sure the three layers line up correctly. If you decide you want a sentiment or other embellishment in the lower left area where there is some space, now would be a good time to add it.
6. Using the printed out template as a guide, poke holes in all three layers with an awl or needle tool.
7. Push decorative brads through the holes and spread prongs on the back side. You’re done!
Some of the rubber stamps and papers I used in this project are by 7gypsies by Canvas Corp Brands and Inkadinkado. The “Good Luck” stamp is by Carolyn Hasenfratz Design and the celtic and spiral stamps are hand carved by me.
 Faux postage is a really fun mixed media project to make because it’s relatively non-threatening to create tiny works of art in a format that everyone is familiar with. There are lots of craft products you can buy that make it easier to make artwork that looks like postage stamps. A long time ago I designed some rubber stamps for this purpose and some of them are currently for sale in my Etsy shop. You can make this project with any other small stamps that you own also and a selection of paper crafting supplies. Enjoy!